文章很长,而且持续更新,建议收藏起来,慢慢读!疯狂创客圈总目录 博客园版 为您奉上珍贵的学习资源 :
免费赠送 :《尼恩Java面试宝典》 持续更新+ 史上最全 + 面试必备 2000页+ 面试必备 + 大厂必备 +涨薪必备
免费赠送 经典图书:《Java高并发核心编程(卷1)加强版》 面试必备 + 大厂必备 +涨薪必备 加尼恩免费领
免费赠送 经典图书:《Java高并发核心编程(卷2)加强版》 面试必备 + 大厂必备 +涨薪必备 加尼恩免费领
免费赠送 经典图书:《Java高并发核心编程(卷3)加强版》 面试必备 + 大厂必备 +涨薪必备 加尼恩免费领
免费赠送 经典图书:《尼恩Java面试宝典 最新版》 面试必备 + 大厂必备 +涨薪必备 加尼恩免费领
免费赠送 资源宝库: Java 必备 百度网盘资源大合集 价值>10000元 加尼恩领取
阅读此文之前,请先阅读 :
分布式事务( 图解 + 史上最全 + 吐血推荐 )
seata AT模式实战(图解+秒懂+史上最全)
参考链接
系统架构知识图谱(一张价值10w的系统架构知识图谱)
https://www.gsm-guard.net/view/link/60fb9421637689719d246739
秒杀系统的架构
https://www.gsm-guard.net/view/link/61148c2b1e08536191d8f92f
Seata 中有三大模块,分别是 TM、RM 和 TC。其中 TM 和 RM 是作为 Seata 的客户端与业务系统集成在一起,TC 作为 Seata 的服务端独立部署。
角色划分:
TM:
事务管理,开启、提交、回滚分布式事务
RM:
资源管理,注册、汇报、执资源,负责接收TC发过来的提交、回滚消息,并作出提交,回滚操作
TC:
事务管理器服务功能,存储事务日志、补偿异常事务等、集中管理事务全局锁(全局行锁)
事务执行整体流程:
说明:本文会以pdf格式持续更新,更多最新尼恩3高pdf笔记,请从下面的链接获取:语雀 或者 码云
先从官网借一张图,回顾AT模式的角色和流程

AT 模式对应于阿里云的全局事务服务(Global Transaction Service,简称 GTS)。


@ComponentScan(
    basePackages = {"io.seata.spring.boot.autoconfigure.properties"}
)
@ConditionalOnProperty(
    prefix = "seata",
    name = {"enabled"},
    havingValue = "true",
    matchIfMissing = true
)
@Configuration
@EnableConfigurationProperties({SeataProperties.class})
public class SeataAutoConfiguration {
    private static final Logger LOGGER = LoggerFactory.getLogger(SeataAutoConfiguration.class);

    public SeataAutoConfiguration() {
    }

    @Bean({"springApplicationContextProvider"})
    @ConditionalOnMissingBean(
        name = {"springApplicationContextProvider"}
    )
    public SpringApplicationContextProvider springApplicationContextProvider() {
        return new SpringApplicationContextProvider();
    }

    @Bean({"failureHandler"})
    @ConditionalOnMissingBean({FailureHandler.class})
    public FailureHandler failureHandler() {
        return new DefaultFailureHandlerImpl();
    }

    @Bean
    @DependsOn({"springApplicationContextProvider", "failureHandler"})
    @ConditionalOnMissingBean({GlobalTransactionScanner.class})
    public GlobalTransactionScanner globalTransactionScanner(SeataProperties seataProperties, FailureHandler failureHandler) {
        if (LOGGER.isInfoEnabled()) {
            www.gsm-guard.net("Automatically configure Seata");
        }

        return new GlobalTransactionScanner(seataProperties.getApplicationId(), seataProperties.getTxServiceGroup(), failureHandler);
    }

    @Bean({"seataAutoDataSourceProxyCreator"})
    @ConditionalOnProperty(
        prefix = "seata",
        name = {"enableAutoDataSourceProxy", "enable-auto-data-source-proxy"},
        havingValue = "true",
        matchIfMissing = true
    )
    @ConditionalOnMissingBean({SeataAutoDataSourceProxyCreator.class})
    public SeataAutoDataSourceProxyCreator seataAutoDataSourceProxyCreator(SeataProperties seataProperties) {
        return new SeataAutoDataSourceProxyCreator(seataProperties.isUseJdkProxy(), seataProperties.getExcludesForAutoProxying());
    }
}
这里有一个配置项SeataProperties,用于配置事务分组名称,即读取如下配置:
@EnableConfigurationProperties(SpringCloudAlibabaConfiguration.class)
public class SeataProperties {

    public String getTxServiceGroup() {
        if (txServiceGroup == null) {
            txServiceGroup = springCloudAlibabaConfiguration.getTxServiceGroup();
        }
        return txServiceGroup;
    }
SpringCloudAlibabaConfiguration 如何加载分组
/**
 * The type Spring cloud alibaba configuration.
 *
 * @author slievrly
 */
@ConfigurationProperties(prefix = StarterConstants.SEATA_SPRING_CLOUD_ALIBABA_PREFIX)
public class SpringCloudAlibabaConfiguration implements ApplicationContextAware {


    /**
     * Gets tx service group.
     *
     * @return the tx service group
     */
    public String getTxServiceGroup() {
     if (txServiceGroup == null) {
     String applicationId = getApplicationId();
     if (applicationId == null) {
     LOGGER.warn("{} is null, please set its value", SPRING_APPLICATION_NAME_KEY);
     }
     txServiceGroup = applicationId + DEFAULT_SPRING_CLOUD_SERVICE_GROUP_POSTFIX;
     }
     return txServiceGroup;
    }
如果没有配置,则使用www.gsm-guard.net+ -seata-service-group生成一个名称,
所以如果不配置www.gsm-guard.net启动会报错
上面用到的常量 ,seata的配置前缀
public static final String SEATA_SPRING_CLOUD_ALIBABA_PREFIX = "spring.cloud.alibaba.seata";
有了applicationId, txServiceGroup之后则创建一个www.gsm-guard.netTransactionScanner对象,主要看它的initClient()
通过Spring 自动调用的 InitializingBean 的 生命周期函数 afterPropertiesSet 初始化
 */
public class GlobalTransactionScanner extends AbstractAutoProxyCreator
    implements InitializingBean, ApplicationContextAware,
    DisposableBean {

    private static final long serialVersionUID = 1L;

    private static final Logger LOGGER = LoggerFactory.getLogger(GlobalTransactionScanner.class);

    private static final int AT_MODE = 1;
    private static final int MT_MODE = 2;

    private static final int ORDER_NUM = 1024;
    private static final int DEFAULT_MODE = AT_MODE + MT_MODE;

    private static final Set PROXYED_SET = new HashSet<>();

    private MethodInterceptor interceptor;

    private final String applicationId;
    private final String txServiceGroup;
    private final int mode;
    private final boolean disableGlobalTransaction = ConfigurationFactory.getInstance().getBoolean(
     ConfigurationKeys.DISABLE_GLOBAL_TRANSACTION, DEFAULT_DISABLE_GLOBAL_TRANSACTION);

    private final FailureHandler failureHandlerHook;


    /**
     * Instantiates a new Global transaction scanner.
     *
     * @param applicationId     the application id
     * @param txServiceGroup     the tx service group
     * @param mode     the mode
     * @param failureHandlerHook the failure handler hook
     */
    public GlobalTransactionScanner(String applicationId, String txServiceGroup, int mode,
     FailureHandler failureHandlerHook) {
     setOrder(ORDER_NUM);
     setProxyTargetClass(true);
     this.applicationId = applicationId;
     this.txServiceGroup = txServiceGroup;
     this.mode = mode;
     this.failureHandlerHook = failureHandlerHook;
    }

    @Override
    public void destroy() {
     ShutdownHook.getInstance().destroyAll();
    }

    private void initClient() {
     if (LOGGER.isInfoEnabled()) {
     www.gsm-guard.net("Initializing Global Transaction Clients ... ");
     }
     if (StringUtils.isNullOrEmpty(applicationId) || StringUtils.isNullOrEmpty(txServiceGroup)) {
     throw new IllegalArgumentException(String.format("applicationId: %s, txServiceGroup: %s", applicationId, txServiceGroup));
     }
     //init TM   //init TM register TM success
     TMClient.init(applicationId, txServiceGroup);
     if (LOGGER.isInfoEnabled()) {
     www.gsm-guard.net("Transaction Manager Client is initialized. applicationId[{}] txServiceGroup[{}]", applicationId, txServiceGroup);
     }
     //init RM
     RMClient.init(applicationId, txServiceGroup);
     if (LOGGER.isInfoEnabled()) {
     www.gsm-guard.net("Resource Manager is initialized. applicationId[{}] txServiceGroup[{}]", applicationId, txServiceGroup);
     }

     if (LOGGER.isInfoEnabled()) {
     www.gsm-guard.net("Global Transaction Clients are initialized. ");
     }


     //注册钩子事件,封装销毁操作
     registerSpringShutdownHook();

    }

    private void registerSpringShutdownHook() {
     if (applicationContext instanceof ConfigurableApplicationContext) {
     ((ConfigurableApplicationContext) applicationContext).registerShutdownHook();
     ShutdownHook.removeRuntimeShutdownHook();
     }
     ShutdownHook.getInstance().addDisposable(TmRpcClient.getInstance(applicationId, txServiceGroup));
     ShutdownHook.getInstance().addDisposable(RmRpcClient.getInstance(applicationId, txServiceGroup));
    }


    private boolean existsAnnotation(Class[] classes) {
     if (CollectionUtils.isNotEmpty(classes)) {
     for (Class clazz : classes) {
     if (clazz == null) {
     continue;
     }
     Method[] methods = clazz.getMethods();
     for (Method method : methods) {
     GlobalTransactional trxAnno = method.getAnnotation(GlobalTransactional.class);
     if (trxAnno != null) {
     return true;
     }

     GlobalLock lockAnno = method.getAnnotation(GlobalLock.class);
     if (lockAnno != null) {
     return true;
     }
     }
     }
     }
     return false;
    }

    private MethodDesc makeMethodDesc(GlobalTransactional anno, Method method) {
     return new MethodDesc(anno, method);
    }

    @Override
    protected Object[] getAdvicesAndAdvisorsForBean(Class beanClass, String beanName, TargetSource customTargetSource)
     throws BeansException {
     return new Object[]{interceptor};
    }
    //InitializingBean实现方法,spring自动调用
    @Override
    public void afterPropertiesSet() {
     if (disableGlobalTransaction) {
     if (LOGGER.isInfoEnabled()) {
     www.gsm-guard.net("Global transaction is disabled.");
     }
     return;
     }

     //初始化
     initClient();
    }

    @Override
    public void setApplicationContext(ApplicationContext applicationContext) throws BeansException {
     this.applicationContext = applicationContext;
     this.setBeanFactory(applicationContext);
    }
}
可以看到初始化了TMClient和RMClient,所以对于一个服务既可以是TM角色也可以是RM角色,至于什么时候是TM或者RM则要看在一次全局事务中@GlobalTransactional注解标注在哪。
TMClient初始化
TM的一个作用就是开启全局事务,实际应用时在需要开启事务的方法上加注解@GlobalTransactional,TMClient初始化主要完成以下三件事:
public class TMClient {

    /**
     * Init.
     *
     * @param applicationId     the application id
     * @param transactionServiceGroup the transaction service group
     */
    public static void init(String applicationId, String transactionServiceGroup) {
     TmRpcClient tmRpcClient = TmRpcClient.getInstance(applicationId, transactionServiceGroup);
     tmRpcClient.init();
    }

}
TM和RM的初始化,初始化话的工作重点:就是连接TC的过程。
public final class TmRpcClient extends AbstractRpcRemotingClient {
 /**
     * Gets instance.
     *
     * @return the instance
     */
    public static TmRpcClient getInstance() {
     if (null == instance) {
     synchronized (TmRpcClient.class) {
     if (null == instance) {
     NettyClientConfig nettyClientConfig = new NettyClientConfig();
     final ThreadPoolExecutor messageExecutor = new ThreadPoolExecutor(
     nettyClientConfig.getClientWorkerThreads(), nettyClientConfig.getClientWorkerThreads(),
     KEEP_ALIVE_TIME, TimeUnit.SECONDS,
     new LinkedBlockingQueue<>(MAX_QUEUE_SIZE),
     new NamedThreadFactory(nettyClientConfig.getTmDispatchThreadPrefix(),
     nettyClientConfig.getClientWorkerThreads()),
     RejectedPolicies.runsOldestTaskPolicy());
     instance = new TmRpcClient(nettyClientConfig, null, messageExecutor);
     }
     }
     }
     return instance;
    }
 @Sharable
public final class TmRpcClient extends AbstractRpcRemotingClient {


    @Override
    public void init() {
     if (initialized.compareAndSet(false, true)) {
     enableDegrade = CONFIG.getBoolean(ConfigurationKeys.SERVICE_PREFIX + ConfigurationKeys.ENABLE_DEGRADE_POSTFIX);
     super.init();
     }
    }


1)启动ScheduledExecutorService定时执行器,每10秒尝试进行一次重连TC
2)重连时,先从file.conf中根据分组名称(service_group)找到集群名称(cluster_name)
3)再根据集群名称找到fescar-server集群ip端口列表
4)从ip列表中选择一个用netty进行连接
 @Override
    public void init() {
     clientBootstrap.setChannelHandlers(new ClientHandler());
     clientBootstrap.start();

     //启动ScheduledExecutorService定时执行器,每10  秒尝试进行一次重连TC
     timerExecutor.scheduleAtFixedRate(new Runnable() {
     @Override
     public void run() {
     clientChannelManager.reconnect(getTransactionServiceGroup());
     }
     }, SCHEDULE_DELAY_MILLS, SCHEDULE_INTERVAL_MILLS, TimeUnit.MILLISECONDS);
     if (NettyClientConfig.isEnableClientBatchSendRequest()) {
     //用于多数据合并,减少通信次数
     mergeSendExecutorService = new ThreadPoolExecutor(MAX_MERGE_SEND_THREAD,
     MAX_MERGE_SEND_THREAD,
     KEEP_ALIVE_TIME, TimeUnit.MILLISECONDS,
     new LinkedBlockingQueue<>(),
     new NamedThreadFactory(getThreadPrefix(), MAX_MERGE_SEND_THREAD));
     mergeSendExecutorService.submit(new MergedSendRunnable());
     }
     super.init();
    }
上面的客户端,调用了 引导类(启动类) 的设置 处理器
clientBootstrap.setChannelHandlers(new ClientHandler());
pcClientBootstrap的方法
   protected void setChannelHandlers(ChannelHandler... handlers) {
     if (null != handlers) {
     this.channelHandlers = handlers;
     }

    }
基础的处理器:
 @Sharable
    class ClientHandler extends AbstractHandler {
     ClientHandler() {
     super(AbstractRpcRemotingClient.this);
     }

     public void dispatch(RpcMessage request, ChannelHandlerContext ctx) {
     if (AbstractRpcRemotingClient.this.clientMessageListener != null) {
     String remoteAddress = NetUtil.toStringAddress(ctx.channel().remoteAddress());
     AbstractRpcRemotingClient.this.clientMessageListener.onMessage(request, remoteAddress);
     }

     }

     public void channelRead(ChannelHandlerContext ctx, Object msg) throws Exception {
     if (msg instanceof RpcMessage) {
     RpcMessage rpcMessage = (RpcMessage)msg;
     if (rpcMessage.getBody() == HeartbeatMessage.PONG) {
     if (AbstractRpcRemotingClient.LOGGER.isDebugEnabled()) {
     AbstractRpcRemotingClient.LOGGER.debug("received PONG from {}", ctx.channel().remoteAddress());
     }

     } else if (rpcMessage.getBody() instanceof MergeResultMessage) {
     MergeResultMessage results = (MergeResultMessage)rpcMessage.getBody();
     MergedWarpMessage mergeMessage = (MergedWarpMessage)AbstractRpcRemotingClient.this.mergeMsgMap.remove(rpcMessage.getId());

     for(int i = 0; i < mergeMessage.msgs.size(); ++i) {
     int msgId = (Integer)mergeMessage.msgIds.get(i);
     MessageFuture future = (MessageFuture)AbstractRpcRemotingClient.this.futures.remove(msgId);
     if (future == null) {
     if (AbstractRpcRemotingClient.LOGGER.isInfoEnabled()) {
     www.gsm-guard.net("msg: {} is not found in futures.", msgId);
     }
     } else {
     future.setResultMessage(results.getMsgs()[i]);
     }
     }

     } else {
     super.channelRead(ctx, msg);
     }
     }
     }

     public void channelInactive(ChannelHandlerContext ctx) throws Exception {
     if (!AbstractRpcRemotingClient.this.messageExecutor.isShutdown()) {
     if (AbstractRpcRemotingClient.LOGGER.isInfoEnabled()) {
     www.gsm-guard.net("channel inactive: {}", ctx.channel());
     }

     AbstractRpcRemotingClient.this.clientChannelManager.releaseChannel(ctx.channel(), NetUtil.toStringAddress(ctx.channel().remoteAddress()));
     super.channelInactive(ctx);
     }
     }
最后我们看一下clientBootstrap.start()方法:
就是使用本地的配置来初始化netty的bootstrap。这些配置在file.conf这个文件中。
    @Override
    public void start() {

     //defaultEventExecutorGroup初始化
     if (this.defaultEventExecutorGroup == null) {
     this.defaultEventExecutorGroup = new DefaultEventExecutorGroup(nettyClientConfig.getClientWorkerThreads(),
     new NamedThreadFactory(getThreadPrefix(nettyClientConfig.getClientWorkerThreadPrefix()),
     nettyClientConfig.getClientWorkerThreads()));
     }

     //对连接的配置
     www.gsm-guard.net(this.eventLoopGroupWorker).channel(
     nettyClientConfig.getClientChannelClazz()).option(
     ChannelOption.TCP_NODELAY, true).option(www.gsm-guard.net_KEEPALIVE, true).option(
     ChannelOption.CONNECT_TIMEOUT_MILLIS, nettyClientConfig.getConnectTimeoutMillis()).option(
     www.gsm-guard.net_SNDBUF, nettyClientConfig.getClientSocketSndBufSize()).option(www.gsm-guard.net_RCVBUF,
     nettyClientConfig.getClientSocketRcvBufSize());

     if (nettyClientConfig.enableNative()) {
     if (PlatformDependent.isOsx()) {
     if (LOGGER.isInfoEnabled()) {
     www.gsm-guard.net("client run on macOS");
     }
     } else {
     //非mac系统则配置epoll模式/ 边沿触发 /和TCP快速确认机制
     //边沿触发 ,请参见尼恩 视频  selector 底层原理
     //当TCP套接口的ACK策略处于QUICKACK模式时,意味着TCP套接口将尝试立即回复对端ACK确认报文。
     bootstrap.option(EpollChannelOption.EPOLL_MODE, EpollMode.EDGE_TRIGGERED)
     .option(EpollChannelOption.TCP_QUICKACK, true);
     }
     }

     bootstrap.handler(
     new ChannelInitializer() {
     @Override
     public void initChannel(SocketChannel ch) {
     ChannelPipeline pipeline = ch.pipeline();
     pipeline.addLast(
     new IdleStateHandler(nettyClientConfig.getChannelMaxReadIdleSeconds(),
     nettyClientConfig.getChannelMaxWriteIdleSeconds(),
     nettyClientConfig.getChannelMaxAllIdleSeconds()))
     .addLast(new ProtocolV1Decoder())
     .addLast(new ProtocolV1Encoder());
     if (null != channelHandlers) {
     addChannelPipelineLast(ch, channelHandlers);
     }
     }
     });

     if (initialized.compareAndSet(false, true) && LOGGER.isInfoEnabled()) {
     www.gsm-guard.net("RpcClientBootstrap has started");
     }
    }
如果文件类型的配置,netty的配置,在file.conf里边


SeataAutoConfiguration
@ComponentScan(
    basePackages = {"io.seata.spring.boot.autoconfigure.properties"}
)
@ConditionalOnProperty(
    prefix = "seata",
    name = {"enabled"},
    havingValue = "true",
    matchIfMissing = true
)
@Configuration
@EnableConfigurationProperties({SeataProperties.class})
public class SeataAutoConfiguration {
....

    @Bean
    @DependsOn({"springApplicationContextProvider", "failureHandler"})
    @ConditionalOnMissingBean({GlobalTransactionScanner.class})
    public GlobalTransactionScanner globalTransactionScanner(SeataProperties seataProperties, FailureHandler failureHandler) {
     if (LOGGER.isInfoEnabled()) {
     www.gsm-guard.net("Automatically configure Seata");
     }

     return new GlobalTransactionScanner(seataProperties.getApplicationId(), seataProperties.getTxServiceGroup(), failureHandler);
    }


}
seataProperties.getApplicationId(),
seataProperties.getTxServiceGroup()
@ConfigurationProperties(prefix = StarterConstants.SEATA_SPRING_CLOUD_ALIBABA_PREFIX)
public class SpringCloudAlibabaConfiguration implements ApplicationContextAware {

    private static final Logger LOGGER = LoggerFactory.getLogger(SpringCloudAlibabaConfiguration.class);
    private static final String SPRING_APPLICATION_NAME_KEY = "www.gsm-guard.net";
    private static final String DEFAULT_SPRING_CLOUD_SERVICE_GROUP_POSTFIX = "-seata-service-group";
    private String applicationId;
    private String txServiceGroup;
    private ApplicationContext applicationContext;
public class StarterConstants {
    private static final int MAP_CAPACITY = 64;
    public static final String SEATA_PREFIX = "seata";
    public static final String SEATA_SPRING_CLOUD_ALIBABA_PREFIX = "spring.cloud.alibaba.seata";
注意:上面方法中的2个参数正是来自我们服务中的application.yml文件,代码如下:
spring:
    application:
     name: seata-seckill-demo
    cloud:
     alibaba:
     seata:
     tx-service-group: my_test_tx_group
初始化 GlobalTransactionScanner
    public GlobalTransactionScanner(String applicationId, String txServiceGroup, int mode, FailureHandler failureHandlerHook) {
     this.disableGlobalTransaction = ConfigurationFactory.getInstance().getBoolean("service.disableGlobalTransaction", false);
     this.setOrder(1024);
     this.setProxyTargetClass(true);
     this.applicationId = applicationId;
     this.txServiceGroup = txServiceGroup;
     this.mode = mode;
     this.failureHandlerHook = failureHandlerHook;
    }
再传递给 TMClient 、RMClient
 //init TM   //init TM register TM success
     TMClient.init(applicationId, txServiceGroup);
     if (LOGGER.isInfoEnabled()) {
     www.gsm-guard.net("Transaction Manager Client is initialized. applicationId[{}] txServiceGroup[{}]", applicationId, txServiceGroup);
     }
     //init RM
     RMClient.init(applicationId, txServiceGroup);
我们首先看一下上面的clientChannelManager.reconnect方法
这个方法在一个定时执行器中,会定时去执行。这段代码在NettyClientChannelManager类,
  void reconnect(String transactionServiceGroup) {
     List availList = null;
     try {
     availList = getAvailServerList(transactionServiceGroup);
     } catch (Exception e) {
     LOGGER.error("Failed to get available servers: {}", e.getMessage(), e);
     return;
     }
     if (CollectionUtils.isEmpty(availList)) {
     String serviceGroup = RegistryFactory.getInstance()
     .getServiceGroup(transactionServiceGroup);
     LOGGER.error("no available service '{}' found, please make sure registry config correct", serviceGroup);
     return;
     }
     for (String serverAddress : availList) {
     try {
     acquireChannel(serverAddress);
     } catch (Exception e) {
     LOGGER.error("{} can not connect to {} cause:{}",FrameworkErrorCode.NetConnect.getErrCode(), serverAddress, e.getMessage(), e);
     }
     }
    }
上面的getAvailServerList是通过transactionServiceGroup这个属性,来查找seata-server集群地址列表,。
逻辑就是通过key (group name )拼接出www.gsm-guard.net name,然后找到这个属性值(default),表示默认的集群,然后去默认的nacos集群,查找seata-server服务列表。
    private List getAvailServerList(String transactionServiceGroup) throws Exception {
     List availInetSocketAddressList = RegistryFactory.getInstance()
     .lookup(transactionServiceGroup);
     if (CollectionUtils.isEmpty(availInetSocketAddressList)) {
     return Collections.emptyList();
     }

     return www.gsm-guard.net()
     .map(NetUtil::toStringAddress)
     .collect(Collectors.toList());
    }
    default String getServiceGroup(String key) {
     Configuration config = ConfigurationFactory.getInstance();
     return config.getConfig("service.vgroupMapping." + key);
    }

拿到default之后,再根据这个,和seata-server, 去 nacos 获取 seata-server服务列表
充分体现nacos 注册中心的特点。

上面获取的availList(seata-server集群地址列表)如果不空,则调用方法acquireChannel。acquireChannel方法首先判断连接是否存在,不存在,则创建连接:
  void reconnect(String transactionServiceGroup) {
     List availList = null;
     try {
     availList = getAvailServerList(transactionServiceGroup);
     } catch (Exception e) {
     LOGGER.error("Failed to get available servers: {}", e.getMessage(), e);
     return;
     }
     if (CollectionUtils.isEmpty(availList)) {
     String serviceGroup = RegistryFactory.getInstance()
     .getServiceGroup(transactionServiceGroup);
     LOGGER.error("no available service '{}' found, please make sure registry config correct", serviceGroup);
     return;
     }
     for (String serverAddress : availList) {
     try {
     acquireChannel(serverAddress);
     } catch (Exception e) {
     LOGGER.error("{} can not connect to {} cause:{}",FrameworkErrorCode.NetConnect.getErrCode(), serverAddress, e.getMessage(), e);
     }
     }
    }
   /**
     * Acquire netty client channel connected to remote server.
     *
     * @param serverAddress server address
     * @return netty channel
     */
    Channel acquireChannel(String serverAddress) {
     Channel channelToServer = channels.get(serverAddress);

     //当前  channel  已经存在连接,直接返回
     if (channelToServer != null) {
     channelToServer = getExistAliveChannel(channelToServer, serverAddress);
     if (null != channelToServer) {
     return channelToServer;
     }
     }
     if (LOGGER.isInfoEnabled()) {
     www.gsm-guard.net("will connect to " + serverAddress);
     }
     channelLocks.putIfAbsent(serverAddress, new Object());
     synchronized (channelLocks.get(serverAddress)) {
     return doConnect(serverAddress);
     }
    }
通过nettyClientKeyPool.borrowObject方法就是从连接池中获取一个连接,seata在这里使用的连接池是commons-pool,
    private Channel doConnect(String serverAddress) {
     Channel channelToServer = channels.get(serverAddress);
     if (channelToServer != null && channelToServer.isActive()) {
     return channelToServer;
     }
     Channel channelFromPool;
     try {
     NettyPoolKey currentPoolKey = poolKeyFunction.apply(serverAddress);
     NettyPoolKey previousPoolKey = poolKeyMap.putIfAbsent(serverAddress, currentPoolKey);

     //TM和RM的初始化流程都要走这段代码,如果是RM,则要set一下ResourceIds,还记得这个吗?看下面RM部分的讲解
     if (null != previousPoolKey && previousPoolKey.getMessage() instanceof RegisterRMRequest) {
     RegisterRMRequest registerRMRequest = (RegisterRMRequest) currentPoolKey.getMessage();
     ((RegisterRMRequest) previousPoolKey.getMessage()).setResourceIds(registerRMRequest.getResourceIds());
     }
     channelFromPool = nettyClientKeyPool.borrowObject(poolKeyMap.get(serverAddress));
     channels.put(serverAddress, channelFromPool);
     } catch (Exception exx) {
     LOGGER.error("{} register RM failed.",FrameworkErrorCode.RegisterRM.getErrCode(), exx);
     throw new FrameworkException("can not register RM,err:" + exx.getMessage());
     }
     return channelFromPool;
    }
上面nettyClientKeyPool.borrowObject方法就是从连接池中获取一个连接,seata在这里使用的连接池是commons-pool,可以看看 commons-pool 的源码。
回到 AbstractRpcRemotingClient
1)启动ScheduledExecutorService定时执行器,每10秒尝试进行一次重连TC
2)重连时,先从file.conf中根据分组名称(service_group)找到集群名称(cluster_name)
3)再根据集群名称找到fescar-server集群ip端口列表
4)从ip列表中选择一个用netty进行连接
public abstract class AbstractRpcRemotingClient extends AbstractRpcRemoting
    implements RegisterMsgListener, ClientMessageSender {
    @Override
    public void init() {
     clientBootstrap.start();
     //启动ScheduledExecutorService定时执行器,每5秒尝试进行一次重连TC
     timerExecutor.scheduleAtFixedRate(new Runnable() {
     @Override
     public void run() {
     clientChannelManager.reconnect(getTransactionServiceGroup());
     }
     }, SCHEDULE_INTERVAL_MILLS, SCHEDULE_INTERVAL_MILLS, TimeUnit.SECONDS);
     if (NettyClientConfig.isEnableClientBatchSendRequest()) {
     //用于多数据合并,减少通信次数
     mergeSendExecutorService = new ThreadPoolExecutor(MAX_MERGE_SEND_THREAD,
     MAX_MERGE_SEND_THREAD,
     KEEP_ALIVE_TIME, TimeUnit.MILLISECONDS,
     new LinkedBlockingQueue<>(),
     new NamedThreadFactory(getThreadPrefix(), MAX_MERGE_SEND_THREAD));
     mergeSendExecutorService.submit(new MergedSendRunnable());
     }
     super.init();
    }
    }
super.init()方法,这个方法在父类AbstractNettyRemoting,代码如下:
    /**
     * Init.
     */
    public void init() {
     timerExecutor.scheduleAtFixedRate(new Runnable() {
     @Override
     public void run() {
     for (Map.Entry entry : futures.entrySet()) {
     if (entry.getValue().isTimeout()) {
     futures.remove(entry.getKey());
     entry.getValue().setResultMessage(null);
     if (LOGGER.isDebugEnabled()) {
     LOGGER.debug("timeout clear future: {}", entry.getValue().getRequestMessage().getBody());
     }
     }
     }

     nowMills = System.currentTimeMillis();
     }
     }, TIMEOUT_CHECK_INTERNAL, TIMEOUT_CHECK_INTERNAL, TimeUnit.MILLISECONDS);
    }
这个方法非常简单,定时任务不断检测消息发送结果,如果是超时3秒,则移除消息,然后把消息结果置为空。
所有的异步发送的消息,都放在 futures:
    private Object sendAsyncRequest(String address, Channel channel, Object msg, long timeout)
     throws TimeoutException {
     if (channel == null) {
     LOGGER.warn("sendAsyncRequestWithResponse nothing, caused by null channel.");
     return null;
     }
     final RpcMessage rpcMessage = new RpcMessage();
     rpcMessage.setId(getNextMessageId());
     rpcMessage.setMessageType(ProtocolConstants.MSGTYPE_RESQUEST_ONEWAY);
     rpcMessage.setCodec(ProtocolConstants.CONFIGURED_CODEC);
     rpcMessage.setCompressor(ProtocolConstants.CONFIGURED_COMPRESSOR);
     rpcMessage.setBody(msg);

     final MessageFuture messageFuture = new MessageFuture();
     messageFuture.setRequestMessage(rpcMessage);
     messageFuture.setTimeout(timeout);
     futures.put(rpcMessage.getId(), messageFuture);

     if (address != null) {
     /*
     The batch send.
     Object From big to small: RpcMessage -> MergedWarpMessage -> AbstractMessage
     @see AbstractRpcRemotingClient.MergedSendRunnable
     */
     if (NettyClientConfig.isEnableClientBatchSendRequest()) {
     ConcurrentHashMap> map = basketMap;
     BlockingQueue basket = map.get(address);
     if (basket == null) {
     map.putIfAbsent(address, new LinkedBlockingQueue<>());
     basket = map.get(address);
     }
     basket.offer(rpcMessage);
     if (LOGGER.isDebugEnabled()) {
     LOGGER.debug("offer message: {}", rpcMessage.getBody());
     }
     if (!isSending) {
     synchronized (mergeLock) {
     mergeLock.notifyAll();
     }
     }
     } else {
     // the single send.
     sendSingleRequest(channel, msg, rpcMessage);
     if (LOGGER.isDebugEnabled()) {
     LOGGER.debug("send this msg[{}] by single send.", msg);
     }
     }
     } else {
     sendSingleRequest(channel, msg, rpcMessage);
     }
     if (timeout > 0) {
     try {
     return messageFuture.get(timeout, TimeUnit.MILLISECONDS);
     } catch (Exception exx) {
     LOGGER.error("wait response error:{},ip:{},request:{}", exx.getMessage(), address, msg);
     if (exx instanceof TimeoutException) {
     throw (TimeoutException) exx;
     } else {
     throw new RuntimeException(exx);
     }
     }
     } else {
     return null;
     }
    }
说明:本文会以pdf格式持续更新,更多最新尼恩3高pdf笔记,请从下面的链接获取:语雀 或者 码云
RM的初始化跟TM基本一样,我们从RMClient.init(applicationId, txServiceGroup)方法讲起
public class RMClient {

    /**
     * Init.
     *
     * @param applicationId     the application id
     * @param transactionServiceGroup the transaction service group
     */
    public static void init(String applicationId, String transactionServiceGroup) {
     RmRpcClient rmRpcClient = RmRpcClient.getInstance(applicationId, transactionServiceGroup);

     //资源管理器ResourceManager

     rmRpcClient.setResourceManager(DefaultResourceManager.get());

     //消息回调监听器,rmHandler用于接收TC在二阶段发出的提交或者回滚请求
     rmRpcClient.setClientMessageListener(new RmMessageListener(DefaultRMHandler.get(), rmRpcClient));
     rmRpcClient.init();
    }

}
此处用到了seata Spi拓展机制,可插拔
public class DefaultResourceManager implements ResourceManager {

    /**
     * all resource managers
     */
    protected static Map resourceManagers
     = new ConcurrentHashMap<>();

    private DefaultResourceManager() {
     initResourceManagers();
    }

    /**
     * Get resource manager.
     *
     * @return the resource manager
     */
    public static DefaultResourceManager get() {
     return SingletonHolder.INSTANCE;
    }


    protected void initResourceManagers() {
     //init all resource managers
     List allResourceManagers = EnhancedServiceLoader.loadAll(ResourceManager.class);
     if (CollectionUtils.isNotEmpty(allResourceManagers)) {
     for (ResourceManager rm : allResourceManagers) {
     resourceManagers.put(rm.getBranchType(), rm);
     }
     }
    }
io.seata.core.model.ResourceManager
io.seata.rm.datasource.DataSourceManager
io.seata.rm.datasource.xa.ResourceManagerXA

它接口定义如下,实现ResourceManagerInbound以及ResourceManagerOutbound接口
public interface ResourceManager extends ResourceManagerInbound, ResourceManagerOutbound {

   // 注册一个resource至事务管理器上
   void registerResource(Resource resource);

   // 从事务管理器上取消注册一个resource
   void unregisterResource(Resource resource);

   // 获取所有管理的resource
   // @return resourceId -> Resource Map
   Map getManagedResources();

   // 获取此事务管理器的分支类型,有AT自动和TCC手动类型
   BranchType getBranchType();
}
ResourceManagerInbound接口提供给TC进行rpc调用的方法
public interface ResourceManagerInbound {

   // TM通知RM提交事务
   BranchStatus branchCommit(BranchType branchType, String xid, long branchId, String resourceId, String applicationData) throws TransactionException;

   // TM通知RM回滚事务
   BranchStatus branchRollback(BranchType branchType, String xid, long branchId, String resourceId, String applicationData) throws TransactionException;
}
提供rpc请求至TC
public interface ResourceManagerOutbound {

   // 请求注册分支resource
   Long branchRegister(BranchType branchType, String resourceId, String clientId, String xid, String applicationData, String lockKeys) throws
     TransactionException;

   // 报告分支状态
   void branchReport(BranchType branchType, String xid, long branchId, BranchStatus status, String applicationData) throws TransactionException;

   // 锁住query
   boolean lockQuery(BranchType branchType, String resourceId, String xid, String lockKeys)
     throws TransactionException;
}
AbstractResourceManager实现ResourceManager提供模板方法
public abstract class AbstractResourceManager implements ResourceManager {

// 创建BranchRegisterRequest请求,通过RmRpcClient客户端使用netty进行rpc调用,请求至TC,返回唯一的分支Id数据,
// 超时或报错抛出TransactionException
@Override
public Long branchRegister(BranchType branchType, String resourceId, String clientId, String xid, String applicationData, String lockKeys) throws TransactionException {
try {
    BranchRegisterRequest request = new BranchRegisterRequest();
    request.setXid(xid);
    request.setLockKey(lockKeys);
    request.setResourceId(resourceId);
    request.setBranchType(branchType);
    request.setApplicationData(applicationData);

    BranchRegisterResponse response = (BranchRegisterResponse) RmRpcClient.getInstance().sendMsgWithResponse(request);
    if (response.getResultCode() == ResultCode.Failed) {
     throw new TransactionException(response.getTransactionExceptionCode(), "Response[" + response.getMsg() + "]");
    }
    return response.getBranchId();
} catch (TimeoutException toe) {
    throw new TransactionException(www.gsm-guard.net, "RPC Timeout", toe);
} catch (RuntimeException rex) {
    throw new TransactionException(TransactionExceptionCode.BranchRegisterFailed, "Runtime", rex);
}
}

// 创建BranchReportRequest请求,通过RmRpcClient客户端使用netty进行rpc调用,请求至TC,返回唯一的分支Id数据,
// 超时或报错抛出TransactionException
@Override
public void branchReport(BranchType branchType, String xid, long branchId, BranchStatus status, String applicationData) throws TransactionException {
try {
    BranchReportRequest request = new BranchReportRequest();
    request.setXid(xid);
    request.setBranchId(branchId);
    request.setStatus(status);
    request.setApplicationData(applicationData);

    BranchReportResponse response = (BranchReportResponse) RmRpcClient.getInstance().sendMsgWithResponse(request);
    if (response.getResultCode() == ResultCode.Failed) {
     throw new TransactionException(response.getTransactionExceptionCode(), "Response[" + response.getMsg() + "]");
    }
} catch (TimeoutException toe) {
    throw new TransactionException(www.gsm-guard.net, "RPC Timeout", toe);
} catch (RuntimeException rex) {
    throw new TransactionException(TransactionExceptionCode.BranchReportFailed, "Runtime", rex);
}
}

// 默认返回false
public boolean lockQuery(BranchType branchType, String resourceId, String xid, String lockKeys) throws TransactionException {
return false;
}

// 需子类实现
public void unregisterResource(Resource resource) {
throw new NotSupportYetException("unregister a resource");
}

// 调用RmRpcClient客户端,创建netty连接,进行rpc调用注册至全局tc
public void registerResource(Resource resource) {
RmRpcClient.getInstance().registerResource(resource.getResourceGroupId(), resource.getResourceId());
}
}
DefaultResourceManager是虚拟的ResourceManager,适配所有的ResourceManager,所有方法调用都委派给对应负责的ResourceManager处理。
public class DefaultResourceManager implements ResourceManager {

   // 所有的ResourceManager缓存
   protected static Map resourceManagers
     = new ConcurrentHashMap<>();
   // 构造方法初始化
   private DefaultResourceManager() {
     initResourceManagers();
   }
   // 单例模式
   public static DefaultResourceManager get() {
     return SingletonHolder.INSTANCE;
   }
   public static void mockResourceManager(BranchType branchType, ResourceManager rm) {
     resourceManagers.put(branchType, rm);
   }
   // 初始化加载所有的ResourceManager,此处目前只有DataResourceManager和TCCResourceManager
   protected void initResourceManagers() {
     //init all resource managers
     List allResourceManagers = EnhancedServiceLoader.loadAll(ResourceManager.class);
     if (CollectionUtils.isNotEmpty(allResourceManagers)) {
     for (ResourceManager rm : allResourceManagers) {
     resourceManagers.put(rm.getBranchType(), rm);
     }
     }
   }
   @Override
   public BranchStatus branchCommit(BranchType branchType, String xid, long branchId,
     String resourceId, String applicationData)
     throws TransactionException {
     return getResourceManager(branchType).branchCommit(branchType, xid, branchId, resourceId, applicationData);
   }
   @Override
   public BranchStatus branchRollback(BranchType branchType, String xid, long branchId,
     String resourceId, String applicationData)
     throws TransactionException {
     return getResourceManager(branchType).branchRollback(branchType, xid, branchId, resourceId, applicationData);
   }
   @Override
   public Long branchRegister(BranchType branchType, String resourceId,
     String clientId, String xid, String applicationData, String lockKeys)
     throws TransactionException {
     return getResourceManager(branchType).branchRegister(branchType, resourceId, clientId, xid, applicationData,
     lockKeys);
   }
   @Override
   public void branchReport(BranchType branchType, String xid, long branchId, BranchStatus status,
     String applicationData) throws TransactionException {
     getResourceManager(branchType).branchReport(branchType, xid, branchId, status, applicationData);
   }
   @Override
   public boolean lockQuery(BranchType branchType, String resourceId,
     String xid, String lockKeys) throws TransactionException {
     return getResourceManager(branchType).lockQuery(branchType, resourceId, xid, lockKeys);
   }
   @Override
   public void registerResource(Resource resource) {
     getResourceManager(resource.getBranchType()).registerResource(resource);
   }
   @Override
   public void unregisterResource(Resource resource) {
     getResourceManager(resource.getBranchType()).unregisterResource(resource);
   }
   @Override
   public Map getManagedResources() {
     Map allResource = new HashMap();
     for (ResourceManager rm : resourceManagers.values()) {
     Map tempResources = rm.getManagedResources();
     if (tempResources != null) {
     allResource.putAll(tempResources);
     }
     }
     return allResource;
   }
   public ResourceManager getResourceManager(BranchType branchType) {
     ResourceManager rm = resourceManagers.get(branchType);
     if (rm == null) {
     throw new FrameworkException("No ResourceManager for BranchType:" + www.gsm-guard.net());
     }
     return rm;
   }
   private static class SingletonHolder {
     private static DefaultResourceManager INSTANCE = new DefaultResourceManager();
   }
}
DataSourceManager继承AbstractResourceManager,管理数据库自动resouce的注册,提交以及回滚等
public class DataSourceManager extends AbstractResourceManager implements Initialize {

   private ResourceManagerInbound asyncWorker;
   private Map dataSourceCache = new ConcurrentHashMap<>();
   public void setAsyncWorker(ResourceManagerInbound asyncWorker) {
     this.asyncWorker = asyncWorker;
   }

   @Override
   public boolean lockQuery(BranchType branchType, String resourceId, String xid, String lockKeys)
     throws TransactionException {
     try {
    // 创建全球锁GlobalLockQueryRequest
     GlobalLockQueryRequest request = new GlobalLockQueryRequest();
     request.setXid(xid);
     request.setLockKey(lockKeys);
     request.setResourceId(resourceId);

     GlobalLockQueryResponse response = null;
    // 如果当前线程context已经是在全球事务处理中,则发送请求
     if (RootContext.inGlobalTransaction()) {
     response = (GlobalLockQueryResponse) RmRpcClient.getInstance().sendMsgWithResponse(request);
     } else if (RootContext.requireGlobalLock()) {
    // 或则开启了本地事务控制,能够获取到本地线程事务对象,进行负载均衡发送请求
     response = (GlobalLockQueryResponse) RmRpcClient.getInstance().sendMsgWithResponse(loadBalance(),
     request, NettyClientConfig.getRpcRequestTimeout());
     } else {
     throw new RuntimeException("unknow situation!");
     }

     if (response.getResultCode() == ResultCode.Failed) {
     throw new TransactionException(response.getTransactionExceptionCode(),
     "Response[" + response.getMsg() + "]");
     }
     return response.isLockable();
     } catch (TimeoutException toe) {
     throw new TransactionException(www.gsm-guard.net, "RPC Timeout", toe);
     } catch (RuntimeException rex) {
     throw new TransactionException(TransactionExceptionCode.LockableCheckFailed, "Runtime", rex);
     }

   }

   // 负载均衡,获取注册中心的所有socket地址列表,返回负载均衡下的address
   private String loadBalance() {
     InetSocketAddress address = null;
     try {
     List inetSocketAddressList = RegistryFactory.getInstance().lookup(
     TmRpcClient.getInstance().getTransactionServiceGroup());
     address = LoadBalanceFactory.getInstance().select(inetSocketAddressList);
     } catch (Exception ignore) {
     LOGGER.error(ignore.getMessage());
     }
     if (address == null) {
     throw new FrameworkException(NoAvailableService);
     }
     return NetUtil.toStringAddress(address);
   }

   public DataSourceManager() {
   }

   // 实例化异步处理器,提供异步删除undo日志的方法
   public void init() {
     AsyncWorker asyncWorker = new AsyncWorker();
     asyncWorker.init();
     initAsyncWorker(asyncWorker);
   }

   // 注册DataSourceProxy resource,放入缓存,同时告知TC进行注册
   public void registerResource(Resource resource) {
     DataSourceProxy dataSourceProxy = (DataSourceProxy) resource;
     dataSourceCache.put(dataSourceProxy.getResourceId(), dataSourceProxy);
     super.registerResource(dataSourceProxy);
   }

   // 根据resourceId获取数据库的DataSource
   public DataSourceProxy get(String resourceId) {
     return (DataSourceProxy) dataSourceCache.get(resourceId);
   }

   // 提交成功,调用asyncWorker提交成功
   public BranchStatus branchCommit(BranchType branchType, String xid, long branchId, String resourceId, String applicationData) throws TransactionException {
     return asyncWorker.branchCommit(branchType, xid, branchId, resourceId, applicationData);
   }

   // 事务回滚
   public BranchStatus branchRollback(BranchType branchType, String xid, long branchId, String resourceId, String applicationData) throws TransactionException {
     DataSourceProxy dataSourceProxy = get(resourceId);
     if (dataSourceProxy == null) {
     throw new ShouldNeverHappenException();
     }
     try {
    // 委派给UndoLogManager回滚已经提交的数据,将当前resouce的dataSourceProxy传入参数
     UndoLogManager.undo(dataSourceProxy, xid, branchId);
     } catch (TransactionException te) {
     if (LOGGER.isInfoEnabled()){
     www.gsm-guard.net("branchRollback failed reason [{}]", te.getMessage());
     }
     if (te.getCode() == TransactionExceptionCode.BranchRollbackFailed_Unretriable) {
     return BranchStatus.PhaseTwo_RollbackFailed_Unretryable;
     } else {
     return BranchStatus.PhaseTwo_RollbackFailed_Retryable;
     }
     }
     return BranchStatus.PhaseTwo_Rollbacked;

   }
   @Override
   public Map getManagedResources() {
     return dataSourceCache;
   }

   // 此为AT自动模式管理器
   public BranchType getBranchType() {
     return www.gsm-guard.net;
   }
}
采用异步方式,提高效率
DataSourceManager事务提交委派给AsyncWorker进行异步提交的。
因为都成功了,无需回滚成功的数据,只需要删除生成的操作日志就行,采用异步方式,提高效率。
public class AsyncWorker implements ResourceManagerInbound {


private static ScheduledExecutorService timerExecutor;

@Override
public BranchStatus branchCommit(BranchType branchType, String xid, long branchId, String resourceId,
     String applicationData) throws TransactionException {
if (!ASYNC_COMMIT_BUFFER.offer(new Phase2Context(branchType, xid, branchId, resourceId, applicationData))) {
  LOGGER.warn("Async commit buffer is FULL. Rejected branch [" + branchId + "/" + xid
     + "] will be handled by housekeeping later.");
}
return BranchStatus.PhaseTwo_Committed;
}

// 初始化
public synchronized void init() {
www.gsm-guard.net("Async Commit Buffer Limit: " + ASYNC_COMMIT_BUFFER_LIMIT);
// 创建定时器,每一秒定时doBranchCommits
timerExecutor = new ScheduledThreadPoolExecutor(1,
  new NamedThreadFactory("AsyncWorker", 1, true));
timerExecutor.scheduleAtFixedRate(new Runnable() {
  @Override
  public void run() {
     try {
     doBranchCommits();
     } catch (Throwable e) {
     www.gsm-guard.net("Failed at async committing ... " + e.getMessage());

     }
  }
}, 10, 1000 * 1, TimeUnit.MILLISECONDS);
}

// 分支提交具体方法
private void doBranchCommits() {
if (ASYNC_COMMIT_BUFFER.size() == 0) {
  return;
}
// 获取需要2步执行的数据Phase2Context,并根据ResourceId进行分类
Map> mappedContexts = new HashMap<>(DEFAULT_RESOURCE_SIZE);
while (!ASYNC_COMMIT_BUFFER.isEmpty()) {
  Phase2Context commitContext = ASYNC_COMMIT_BUFFER.poll();
  List contextsGroupedByResourceId = mappedContexts.get(commitContext.resourceId);
  if (contextsGroupedByResourceId == null) {
     contextsGroupedByResourceId = new ArrayList<>();
     mappedContexts.put(commitContext.resourceId, contextsGroupedByResourceId);
  }
  contextsGroupedByResourceId.add(commitContext);
}

// 遍历Map.Entry>
for (Map.Entry> entry : mappedContexts.entrySet()) {
  Connection conn = null;
  try {
     try {
// 获取DataSourceManager
     DataSourceManager resourceManager = (DataSourceManager)DefaultResourceManager.get()
     .getResourceManager(www.gsm-guard.net);
// 更加resourceId获取DataSourceProxy
     DataSourceProxy dataSourceProxy = resourceManager.get(entry.getKey());
     if (dataSourceProxy == null) {
     throw new ShouldNeverHappenException("Failed to find resource on " + entry.getKey());
     }
// 创建连接
     conn = dataSourceProxy.getPlainConnection();
     } catch (SQLException sqle) {
     LOGGER.warn("Failed to get connection for async committing on " + entry.getKey(), sqle);
     continue;
     }
    // 将缓存中的xid和branchId放入数组set中
     List contextsGroupedByResourceId = entry.getValue();
     Set xids = new LinkedHashSet<>(UNDOLOG_DELETE_LIMIT_SIZE);
     Set branchIds = new LinkedHashSet<>(UNDOLOG_DELETE_LIMIT_SIZE);
    // 获取当前resourceId下需要执行的commitContext
     for (Phase2Context commitContext : contextsGroupedByResourceId) {
     xids.add(commitContext.xid);
     branchIds.add(commitContext.branchId);
     int maxSize = xids.size() > branchIds.size() ? xids.size() : branchIds.size();
    // 如果xid或branchId数组set中有一个等于批量操作1000条,就调用批量删除
     if (maxSize == UNDOLOG_DELETE_LIMIT_SIZE) {
     try {
     // 调用UndoLogManager删除日志
     UndoLogManager.batchDeleteUndoLog(xids, branchIds, conn);
     } catch (Exception ex) {
     LOGGER.warn("Failed to batch delete undo log [" + branchIds + "/" + xids + "]", ex);
     }
     xids.clear();
     branchIds.clear();
     }
     }

     if (CollectionUtils.isEmpty(xids) || CollectionUtils.isEmpty(branchIds)) {
     return;
     }
     // 批量删除最后不满1000的数据
     try {
     UndoLogManager.batchDeleteUndoLog(xids, branchIds, conn);
     } catch (Exception ex) {
     LOGGER.warn("Failed to batch delete undo log [" + branchIds + "/" + xids + "]", ex);
     }

  } finally {
     if (conn != null) {
     try {
     conn.close();
     } catch (SQLException closeEx) {
     LOGGER.warn("Failed to close JDBC resource while deleting undo_log ", closeEx);
     }
     }
  }
}
}

// 不支持回滚
public BranchStatus branchRollback(BranchType branchType, String xid, long branchId, String resourceId,
     String applicationData) throws TransactionException {
throw new NotSupportYetException();

}
}
UndoLogManager批量删除undo_log表中日志的逻辑,创建sql,然后批量设置参数,最后批量执行
public static void batchDeleteUndoLog(Set xids, Set branchIds, Connection conn) throws SQLException {
int xidSize = xids.size();
int branchIdSize = branchIds.size();
String batchDeleteSql = toBatchDeleteUndoLogSql(xidSize, branchIdSize);
PreparedStatement deletePST = null;
try {
    deletePST = conn.prepareStatement(batchDeleteSql);
    int paramsIndex = 1;
    for (Long branchId : branchIds) {
     deletePST.setLong(paramsIndex++, branchId);
    }
    for (String xid : xids) {
     deletePST.setString(paramsIndex++, xid);
    }
    int deleteRows = deletePST.executeUpdate();
    if (LOGGER.isDebugEnabled()) {
     LOGGER.debug("batch delete undo log size " + deleteRows);
    }
} catch (Exception e) {
    if (!(e instanceof SQLException)) {
     e = new SQLException(e);
    }
    throw (SQLException)e;
} finally {
    if (deletePST != null) {
     deletePST.close();
    }
}

}
1)启动ScheduledExecutorService定时执行器,每5秒尝试进行一次重连TC
2)重连时,先从file.conf中根据分组名称(service_group)找到集群名称(cluster_name)
3)再根据集群名称找到fescar-server集群ip端口列表
4)从ip列表中选择一个用netty进行连接
@Sharable
public final class RmNettyRemotingClient extends AbstractNettyRemotingClient {


   public static RmNettyRemotingClient getInstance(String applicationId, String transactionServiceGroup) {
     RmNettyRemotingClient rmNettyRemotingClient = getInstance();
     rmNettyRemotingClient.setApplicationId(applicationId);
     rmNettyRemotingClient.setTransactionServiceGroup(transactionServiceGroup);
     return rmNettyRemotingClient;
   }


   @Override
   public void init() {
     // registry processor
     registerProcessor();
     // CAS 保证原子性
     if (initialized.compareAndSet(false, true)) {
     	super.init();
							}
			}
public abstract class AbstractNettyRemotingClient extends AbstractNettyRemoting
 implements RemotingClient {
 @Override
 public void init() {
     //启动ScheduledExecutorService定时执行器,每10秒尝试进行一次重连TC
     timerExecutor.scheduleAtFixedRate(new Runnable() {
     @Override
     public void run() {
     clientChannelManager.reconnect(getTransactionServiceGroup());
     }
     }, SCHEDULE_DELAY_MILLS, SCHEDULE_INTERVAL_MILLS, TimeUnit.MILLISECONDS);
     //用于多数据合并,减少通信次数
     if (NettyClientConfig.isEnableClientBatchSendRequest()) {
     mergeSendExecutorService = new ThreadPoolExecutor(MAX_MERGE_SEND_THREAD,
     MAX_MERGE_SEND_THREAD,
     KEEP_ALIVE_TIME, TimeUnit.MILLISECONDS,
     new LinkedBlockingQueue<>(),
     new NamedThreadFactory(getThreadPrefix(), MAX_MERGE_SEND_THREAD));
     mergeSendExecutorService.submit(new MergedSendRunnable());
     }
     super.init();
     clientBootstrap.start();
 }
 }
在RMClient初始化时,启动了RMHandlerAT接收TC在二阶段发出的提交或者回滚请求

说明:本文会以pdf格式持续更新,更多最新尼恩3高pdf笔记,请从下面的链接获取:语雀 或者 码云
要使用AT模式,必须向spring ioc注入DataSourceProxy
  @Bean
  public DataSourceProxy dataSourceProxy(DruidDataSource druidDataSource){
     return new DataSourceProxy(druidDataSource);
  }
如果使用了seata-spring-boot-start.jar这个包,就不需要手动向spring ioc注入DataSourceProxy。这个包里面配置了spring boot的自动装配 一个 SeataAutoDataSourceProxyCreator
SeataAutoConfiguration.seataAutoDataSourceProxyCreator
seata的加载入口位于io.seata.spring.boot.autoconfigure.SeataAutoConfiguration:
@ComponentScan(basePackages = "io.seata.spring.boot.autoconfigure.properties")
@ConditionalOnProperty(prefix = StarterConstants.SEATA_PREFIX, name = "enabled", havingValue = "true", matchIfMissing = true)
@Configuration
@EnableConfigurationProperties({SeataProperties.class})
public class SeataAutoConfiguration {
.....

    @Bean(BEAN_NAME_SEATA_AUTO_DATA_SOURCE_PROXY_CREATOR)
    @ConditionalOnProperty(prefix = StarterConstants.SEATA_PREFIX,
				    name = {"enableAutoDataSourceProxy", "enable-auto-data-source-proxy"},
								havingValue = "true", matchIfMissing = true)
    @ConditionalOnMissingBean(SeataAutoDataSourceProxyCreator.class)
    public SeataAutoDataSourceProxyCreator seataAutoDataSourceProxyCreator(SeataProperties seataProperties) {

     	return new SeataAutoDataSourceProxyCreator(seataProperties.isUseJdkProxy(),seataProperties.getExcludesForAutoProxying());
    }
}
看一下最后一个方法中返回了一个SeataAutoDataSourceProxyCreator,这个对象是用来干嘛的呢?
不是很奇怪这里并没有配置DataSourceProxy?
它继承了AbstractAutoProxyCreator.
AbstractAutoProxyCreator是aop里面一个把目标对象转换成代理对象的一个后置处理器。
在spring中,只要把后置处理器的bean定义给到ioc容器,BeanFactory就调用后置处理器的各种方法参与到bean的生命周期的各个步骤中。来看一下SeataAutoDataSourceProxyCreator,它的shouldSkip是说这个后置处理器只会对DataSource对象生成其代理对象,它用到的横切关注点逻辑SeataAutoDataSourceProxyAdvice。
public class SeataAutoDataSourceProxyCreator extends AbstractAutoProxyCreator {
	private static final Logger LOGGER = LoggerFactory.getLogger(SeataAutoDataSourceProxyCreator.class);
	private final String[] excludes;
	private final Advisor advisor = new DefaultIntroductionAdvisor(new SeataAutoDataSourceProxyAdvice());

	public SeataAutoDataSourceProxyCreator(boolean useJdkProxy, String[] excludes) {
					this.excludes = excludes;
					setProxyTargetClass(!useJdkProxy);
	}

	@Override
	protected Object[] getAdvicesAndAdvisorsForBean(Class beanClass, String beanName, TargetSource customTargetSource) throws BeansException {
		if (LOGGER.isInfoEnabled()) {
					www.gsm-guard.net("Auto proxy of [{}]", beanName);
		}
					return new Object[]{advisor};
	}

	// 这个方法里面确定对那些Bean不起作用
	// 非DataSource的都会不起作用
	@Override
	protected boolean shouldSkip(Class beanClass, String beanName) {
			return SeataProxy.class.isAssignableFrom(beanClass) ||
						!DataSource.class.isAssignableFrom(beanClass) ||
			Arrays.asList(excludes).contains(beanClass.getName());
	}
}
public Object postProcessBeforeInstantiation(Class beanClass, String beanName) throws BeansException {
Object cacheKey = this.getCacheKey(beanClass, beanName);
if (beanName == null || !this.targetSourcedBeans.contains(beanName)) {
		if (this.advisedBeans.containsKey(cacheKey)) {
								return null;
		}

		if (this.isInfrastructureClass(beanClass) || this.shouldSkip(beanClass, beanName)) {
			this.advisedBeans.put(cacheKey, Boolean.FALSE);
			return null;
		}
}

if (beanName != null) {
	TargetSource targetSource = this.getCustomTargetSource(beanClass, beanName);
		if (targetSource != null) {
			this.targetSourcedBeans.add(beanName);

		//获取拦截器
		Object[] specificInterceptors = this.getAdvicesAndAdvisorsForBean(beanClass, beanName, targetSource);

		// 创建代理
	Object proxy = this.createProxy(beanClass, beanName, specificInterceptors, targetSource);
		this.proxyTypes.put(cacheKey, proxy.getClass());
		return proxy;
	}
}

return null;
}
它用到的横切关注点逻辑SeataAutoDataSourceProxyAdvice。
SeataAutoDataSourceProxyAdvice里面的invoke方法,一旦调用DataSource的方法,就会把它替换成DataSourceProxy对象。
ostProcessBeforeInitialization为DataSource生成代理的DataSource。
public class SeataAutoDataSourceProxyAdvice implements MethodInterceptor, IntroductionInfo {

@Override
public Object invoke(MethodInvocation invocation) throws Throwable {
			DataSourceProxy dataSourceProxy = DataSourceProxyHolder.get().putDataSource((DataSource) invocation.getThis());
			Method method = invocation.getMethod();
			Object[] args = invocation.getArguments();
			Method m = BeanUtils.findDeclaredMethod(DataSourceProxy.class, method.getName(), method.getParameterTypes());
			if (m != null) {
							return m.invoke(dataSourceProxy, args);
			} else {
							return invocation.proceed();
			}
}

@Override
public Class[] getInterfaces() {
			return new Class[]{SeataProxy.class};
}

}
DataSourceProxy初始化的时候向server注册RM资源管理器
	public DataSourceProxy(DataSource targetDataSource) {
					this(targetDataSource, DEFAULT_RESOURCE_GROUP_ID);
	}

	public DataSourceProxy(DataSource targetDataSource, String resourceGroupId) {
					super(targetDataSource);
					init(targetDataSource, resourceGroupId);
	}
DataSourceProxy的init方法里面调用了DefaultResourceManager的registerResource
private void init(DataSource dataSource, String resourceGroupId) {
this.resourceGroupId = resourceGroupId;
try (Connection connection = dataSource.getConnection()) {
		jdbcUrl = connection.getMetaData().getURL();
		dbType = JdbcUtils.getDbType(jdbcUrl);
		if (JdbcConstants.ORACLE.equals(dbType)) {
						userName = connection.getMetaData().getUserName();
		}
} catch (SQLException e) {
		throw new IllegalStateException("can not init dataSource", e);
}
DefaultResourceManager.get().registerResource(this);
if (ENABLE_TABLE_META_CHECKER_ENABLE) {
		tableMetaExcutor.scheduleAtFixedRate(() -> {
						try (Connection connection = dataSource.getConnection()) {
										TableMetaCacheFactory.getTableMetaCache(DataSourceProxy.this.getDbType())
														.refresh(connection, DataSourceProxy.this.getResourceId());
						} catch (Exception ignore) {
						}
		}, 0, TABLE_META_CHECKER_INTERVAL, TimeUnit.MILLISECONDS);
}
}
DefaultResourceManager的registerResource方法,首先根据resource的branchType选择一个ResourceManager.
resource是DataSourceProxy,它的branchType是www.gsm-guard.net,www.gsm-guard.net对应的ResourceManager是DataSourceManager。
@Override
public void registerResource(Resource resource) {
     getResourceManager(resource.getBranchType()).registerResource(resource);
}
DataSourceManager的registerResource方法,最终调用了父类的registerResource,父类就是AbstractResourceManager。
@Override
public void registerResource(Resource resource) {
				DataSourceProxy dataSourceProxy = (DataSourceProxy)resource;
				dataSourceCache.put(dataSourceProxy.getResourceId(), dataSourceProxy);
				super.registerResource(dataSourceProxy);
}
AbstractResourceManager的registerResource方法,调用RmRpcClient中的registerResource方法去了。
@Override
public void registerResource(Resource resource) {
				RmRpcClient.getInstance().registerResource(resource.getResourceGroupId(), resource.getResourceId());
}
RmRpcClient的registerResource方法,配置的seata server可能是单机或者集群,集群的话需要向每个sever都注册一下。
public void registerResource(String resourceGroupId, String resourceId) {
			if (getClientChannelManager().getChannels().isEmpty()) {
				getClientChannelManager().reconnect(transactionServiceGroup);
				return;
			}
			synchronized (getClientChannelManager().getChannels()) {
							for (Map.Entry entry : getClientChannelManager().getChannels().entrySet()) {
									String serverAddress = entry.getKey();									Channel rmChannel = entry.getValue();
											if (LOGGER.isInfoEnabled()) {
						www.gsm-guard.net("will register resourceId:{}", resourceId);
											}
						sendRegisterMessage(serverAddress, rmChannel, resourceId);
							}
			}
}
sendRegisterMessage里面生成了RegisterRMRequest对象,然后把RegisterRMRequest对象传给sendAsyncRequestWithoutResponse方法。
public void sendRegisterMessage(String serverAddress, Channel channel, String resourceId) {
RegisterRMRequest message = new RegisterRMRequest(applicationId, transactionServiceGroup);
message.setResourceIds(resourceId);
try {
				super.sendAsyncRequestWithoutResponse(channel, message);
} catch (FrameworkException e) {
				if (e.getErrcode() == FrameworkErrorCode.ChannelIsNotWritable && serverAddress != null) {
					getClientChannelManager().releaseChannel(channel, serverAddress);
		     		if (LOGGER.isInfoEnabled()) {
						www.gsm-guard.net("remove not writable channel:{}", channel);
					}
				} else {
			LOGGER.error("register resource failed, channel:{},resourceId:{}", channel, resourceId, e);
				}
} catch (TimeoutException e) {
				LOGGER.error(e.getMessage());
}
}
sendAsyncRequestWithoutResponse里面调用了sendAsyncRequest
    protected Object sendAsyncRequestWithoutResponse(Channel channel, Object msg) throws
     TimeoutException {
     return sendAsyncRequest(null, channel, msg, 0);
    }
sendAsyncRequest方法里面,第一步生成了RpcMessage 和MessageFuture 对象;第二步真正调用server;第三步,等待server返回结果。重要的是第二步,又分有没有开启多线程去处理发送消息,如果有,就把RpcMessage 直接放到阻塞队列里面,等待线程处理,没有的话直接调用sendSingleRequest方法。
   private Object sendAsyncRequest(String address, Channel channel, Object msg, long timeout)
     throws TimeoutException {
     if (channel == null) {
     LOGGER.warn("sendAsyncRequestWithResponse nothing, caused by null channel.");
     return null;
     }
     final RpcMessage rpcMessage = new RpcMessage();
     rpcMessage.setId(getNextMessageId());
     rpcMessage.setMessageType(ProtocolConstants.MSGTYPE_RESQUEST_ONEWAY);
     rpcMessage.setCodec(ProtocolConstants.CONFIGURED_CODEC);
     rpcMessage.setCompressor(ProtocolConstants.CONFIGURED_COMPRESSOR);
     rpcMessage.setBody(msg);

     final MessageFuture messageFuture = new MessageFuture();
     messageFuture.setRequestMessage(rpcMessage);
     messageFuture.setTimeout(timeout);
     futures.put(rpcMessage.getId(), messageFuture);

     if (address != null) {
     /*
     The batch send.
     Object From big to small: RpcMessage -> MergedWarpMessage -> AbstractMessage
     @see AbstractRpcRemotingClient.MergedSendRunnable
     */
     if (NettyClientConfig.isEnableClientBatchSendRequest()) {
     ConcurrentHashMap> map = basketMap;
     BlockingQueue basket = map.get(address);
     if (basket == null) {
     map.putIfAbsent(address, new LinkedBlockingQueue<>());
     basket = map.get(address);
     }
     basket.offer(rpcMessage);
     if (LOGGER.isDebugEnabled()) {
     LOGGER.debug("offer message: {}", rpcMessage.getBody());
     }
     if (!isSending) {
     synchronized (mergeLock) {
     mergeLock.notifyAll();
     }
     }
     } else {
     // the single send.
     sendSingleRequest(channel, msg, rpcMessage);
     if (LOGGER.isDebugEnabled()) {
     LOGGER.debug("send this msg[{}] by single send.", msg);
     }
     }
     } else {
     sendSingleRequest(channel, msg, rpcMessage);
     }
     if (timeout > 0) {
     try {
     return messageFuture.get(timeout, TimeUnit.MILLISECONDS);
     } catch (Exception exx) {
     LOGGER.error("wait response error:{},ip:{},request:{}", exx.getMessage(), address, msg);
     if (exx instanceof TimeoutException) {
     throw (TimeoutException) exx;
     } else {
     throw new RuntimeException(exx);
     }
     }
     } else {
     return null;
     }
    }
sendSingleRequest,这里真正调用了 channel.writeAndFlush把数据发送出去。
    private void sendSingleRequest(Channel channel, Object msg, RpcMessage rpcMessage) {
     ChannelFuture future;
     channelWritableCheck(channel, msg);
     future = channel.writeAndFlush(rpcMessage);
     future.addListener(new ChannelFutureListener() {
     @Override
     public void operationComplete(ChannelFuture future) {
     if (!future.isSuccess()) {
     MessageFuture messageFuture = futures.remove(rpcMessage.getId());
     if (messageFuture != null) {
     messageFuture.setResultMessage(future.cause());
     }
     destroyChannel(future.channel());
     }
     }
     });
    }
seata不止会代理数据源,还会对Connection,Statement做代理封装。对sql解析发生在StatementProxy中.
  1 public class StatementProxy extends AbstractStatementProxy {
  2
  3     @Override
  4     public boolean execute(String sql) throws SQLException {
  5     www.gsm-guard.netSQL = sql;
  6     return ExecuteTemplate.execute(this, new StatementCallback() {
  7     @Override
  8     public Boolean execute(T statement, Object... args) throws SQLException {
  9     return statement.execute((String) args[0]);
 10     }
 11     }, sql);
 12     }
 13 }
 14
 15 public class ExecuteTemplate{
 16
 17    public static  T execute(SQLRecognizer sqlRecognizer,
 18     StatementProxy statementProxy,
 19     StatementCallback statementCallback,
 20     Object... args) throws SQLException {
 21     if (!RootContext.inGlobalTransaction() && !RootContext.requireGlobalLock()) {
 22     // 未开启全局事务时,正常执行
 23     return statementCallback.execute(statementProxy.getTargetStatement(), args);
 24     }
 25     //解析SQL
 26     if (sqlRecognizer == null) {
 27     sqlRecognizer = SQLVisitorFactory.get(
 28     statementProxy.getTargetSQL(),
 29     statementProxy.getConnectionProxy().getDbType());
 30     }
 31     Executor executor = null;
 32     if (sqlRecognizer == null) {
 33     executor = new PlainExecutor(statementProxy, statementCallback);
 34     } else {
 35     //对不同的SQL类型特殊处理
 36     switch (sqlRecognizer.getSQLType()) {
 37     case INSERT:
 38     executor = new InsertExecutor(statementProxy, statementCallback, sqlRecognizer);
 39     break;
 40     case UPDATE:
 41     executor = new UpdateExecutor(statementProxy, statementCallback, sqlRecognizer);
 42     break;
 43     case DELETE:
 44     executor = new DeleteExecutor(statementProxy, statementCallback, sqlRecognizer);
 45     break;
 46     case SELECT_FOR_UPDATE:
 47     executor = new SelectForUpdateExecutor(statementProxy, statementCallback, sqlRecognizer);
 48     break;
 49     default:
 50     executor = new PlainExecutor(statementProxy, statementCallback);
 51     break;
 52     }
 53     }
 54     T rs = null;
 55     try {
 56     //真正执行业务逻辑
 57     rs = executor.execute(args);
 58     } catch (Throwable ex) {
 59     if (!(ex instanceof SQLException)) {
 60     // Turn other exception into SQLException
 61     ex = new SQLException(ex);
 62     }
 63     throw (SQLException)ex;
 64     }
 65     return rs;
 66     }
 67 }
 68
 69
 70 public abstract class AbstractDMLBaseExecutor extends BaseTransactionalExecutor {
 71
 72     //接下来执行到这里
 73     @Override
 74     public T doExecute(Object... args) throws Throwable {
 75     AbstractConnectionProxy connectionProxy = statementProxy.getConnectionProxy();
 76     if (connectionProxy.getAutoCommit()) {
 77     return executeAutoCommitTrue(args);
 78     } else {
 79     return executeAutoCommitFalse(args);
 80     }
 81     }
 82
 83     protected T executeAutoCommitFalse(Object[] args) throws Exception {
 84     //业务SQL执行前快照
 85     TableRecords beforeImage = beforeImage();
 86     //真正执行业务SQL
 87     T result = statementCallback.execute(statementProxy.getTargetStatement(), args);
 88     //业务SQL执行后快照
 89     TableRecords afterImage = afterImage(beforeImage);
 90     //准备快照
 91     prepareUndoLog(beforeImage, afterImage);
 92     return result;
 93     }
 94
 95
 96     protected void prepareUndoLog(TableRecords beforeImage, TableRecords afterImage) throws SQLException {
 97     if (beforeImage.getRows().size() == 0 && afterImage.getRows().size() == 0) {
 98     return;
 99     }
100     ConnectionProxy connectionProxy = statementProxy.getConnectionProxy();
101     TableRecords lockKeyRecords = sqlRecognizer.getSQLType() == SQLType.DELETE ? beforeImage : afterImage;
102     String lockKeys = buildLockKey(lockKeyRecords);
103     connectionProxy.appendLockKey(lockKeys);
104     SQLUndoLog sqlUndoLog = buildUndoItem(beforeImage, afterImage);
105     connectionProxy.appendUndoLog(sqlUndoLog);
106     }
107 }
说明:本文会以pdf格式持续更新,更多最新尼恩3高pdf笔记,请从下面的链接获取:语雀 或者 码云
问题:
@GlobalTransactional注解的方法,是如何初始化

GlobalTransactionScanner实现了AbstractAutoProxyCreator
/**
 * The type Global transaction scanner.
 *
 * @author slievrly
 */
public class GlobalTransactionScanner extends AbstractAutoProxyCreator
    implements InitializingBean, ApplicationContextAware,
    DisposableBean {
AbstractAutoProxyCreator就比较复杂了,它Spring实现AOP的一种方式。
本质上是一个BeanPostProcessor,他在bean初始化之前,调用内部的createProxy方法,创建一个bean的AOP代理bean并返回。
但是它不是把所有的bean都增强,选取哪些bean做增强呢?
选取的策略是根据 getAdvicesAndAdvisorsForBean 方法返回的Advices/Advisors来确定的。
GlobalTransactionScanner的 getAdvicesAndAdvisorsForBean 方法,如下:

其实总体的逻辑基本就清晰了,GlobalTransactionScanner扫描有注解的bean,做AOP增强。
GlobalTransactionScannerde 的wrapIfNecessary这里面做了两个事情,
1)根据配置判断,到底用的是TCC模式,还是其他模式,会放置不同的interceptor。这些interceptor会在getAdvicesAndAdvisorsForBean中返回。
2)如果Bean不是代理类,则走Spring默认的AOP的Wrap;否则调用getAdvicesAndAdvisorsForBean获取要使用的Advices/Advisors,其实就是用第一步中配置的interceptor。
GlobalTransactionScanner 的wrapIfNecessary使用到 getAdvicesAndAdvisorsForBean:
这个方法从名字上就已经知道作用了,并不是所有的bean都会被增强。哪些需要被增强,还看对应的Advices和Advisors具体要拦截哪些Bean。
    @Override
    protected Object wrapIfNecessary(Object bean, String beanName, Object cacheKey) {
     if (disableGlobalTransaction) {
     return bean;
     }
     try {
     synchronized (PROXYED_SET) {
     if (PROXYED_SET.contains(beanName)) {
     return bean;
     }
     interceptor = null;
     //是否TCC
     //check TCC proxy
     if (TCCBeanParserUtils.isTccAutoProxy(bean, beanName, applicationContext)) {
     //TCC代理的Bean有 sofa:reference/dubbo:reference/本地TCC
     //使用TccActionInterceptor作为Advices/Advisors
     //TCC interceptor, proxy bean of sofa:reference/dubbo:reference, and LocalTCC
     interceptor = new TccActionInterceptor(TCCBeanParserUtils.getRemotingDesc(beanName));
     } else {
     Class serviceInterface = SpringProxyUtils.findTargetClass(bean);
     Class[] interfacesIfJdk = SpringProxyUtils.findInterfaces(bean);

     if (!existsAnnotation(new Class[]{serviceInterface})
     && !existsAnnotation(interfacesIfJdk)) {
     return bean;
     }

     if (interceptor == null) {

     ////使用GlobalTransactionalInterceptor作为Advices/Advisors
     if (globalTransactionalInterceptor == null) {
     globalTransactionalInterceptor = new GlobalTransactionalInterceptor(failureHandlerHook);
     ConfigurationCache.addConfigListener(
     ConfigurationKeys.DISABLE_GLOBAL_TRANSACTION,
     (ConfigurationChangeListener)globalTransactionalInterceptor);
     }
     interceptor = globalTransactionalInterceptor;
     }
     }

     www.gsm-guard.net("Bean[{}] with name [{}] would use interceptor [{}]", bean.getClass().getName(), beanName, interceptor.getClass().getName());
     //不是代理类则走Spring的默认wrap,是代理则用上面配置的interceptor代理
     if (!AopUtils.isAopProxy(bean)) {
     bean = super.wrapIfNecessary(bean, beanName, cacheKey);
     } else {
     AdvisedSupport advised = SpringProxyUtils.getAdvisedSupport(bean);
     Advisor[] advisor = buildAdvisors(beanName, getAdvicesAndAdvisorsForBean(null, null, null));
     for (Advisor avr : advisor) {
     advised.addAdvisor(0, avr);
     }
     }
     PROXYED_SET.add(beanName);
     return bean;
     }
     } catch (Exception exx) {
     throw new RuntimeException(exx);
     }
    }
我们看其他的方法前,先回顾一下Spring中Bean的关键初始化过程:
实例化 -> 属性注入 -> postProcessBeforeInitialization -> afterPropertiesSet/init方法 -> postProcessAfterInitialization
属性注入这一步和我们讲事务没关系,忽略。
class AbstractAutoProxyCreator的方法

 public Object postProcessAfterInitialization(@Nullable Object bean, String beanName) {
     if (bean != null) {
     Object cacheKey = this.getCacheKey(bean.getClass(), beanName);
     if (this.earlyProxyReferences.remove(cacheKey) != bean) {
     return this.wrapIfNecessary(bean, beanName, cacheKey);
     }
     }

     return bean;
    }
以上的bean初始化场景为:
singletonFactory.getObject()实例化Bean的时候,最终调用
getEarlyBeanReference来实例化Bean,
DefaultSingletonBeanRegistry的方法

 public Object getSingleton(String beanName, ObjectFactory singletonFactory) {

     try {
     singletonObject = singletonFactory.getObject();
     newSingleton = true;
     }
TM的一个作用就是开启全局事务,实际应用时在需要开启事务的方法上加注解@GlobalTransactional,与之相关的,有一个拦截器,www.gsm-guard.netTransactionalInterceptor:
public class GlobalTransactionalInterceptor implements ConfigurationChangeListener, MethodInterceptor {


    /**
     * Instantiates a new Global transactional interceptor.
     *
     * @param failureHandler the failure handler
     */
    public GlobalTransactionalInterceptor(FailureHandler failureHandler) {
     this.failureHandler = failureHandler == null ? DEFAULT_FAIL_HANDLER : failureHandler;
     this.disable = ConfigurationFactory.getInstance().getBoolean(ConfigurationKeys.DISABLE_GLOBAL_TRANSACTION,
     DEFAULT_DISABLE_GLOBAL_TRANSACTION);
    }


    @Override
    public Object invoke(final MethodInvocation methodInvocation) throws Throwable {
     Class targetClass =
     methodInvocation.getThis() != null ? AopUtils.getTargetClass(methodInvocation.getThis()) : null;
     Method specificMethod = ClassUtils.getMostSpecificMethod(methodInvocation.getMethod(), targetClass);
     if (specificMethod != null && !specificMethod.getDeclaringClass().equals(Object.class)) {
     final Method method = BridgeMethodResolver.findBridgedMethod(specificMethod);
     final GlobalTransactional globalTransactionalAnnotation =
     getAnnotation(method, targetClass, GlobalTransactional.class);
     final GlobalLock globalLockAnnotation = getAnnotation(method, targetClass, GlobalLock.class);
     boolean localDisable = disable || (degradeCheck && degradeNum >= degradeCheckAllowTimes);
     if (!localDisable) {
     if (globalTransactionalAnnotation != null) {
     // //全局事务开始
     return handleGlobalTransaction(methodInvocation, globalTransactionalAnnotation);
     } else if (globalLockAnnotation != null) {

     ////全局锁
     return handleGlobalLock(methodInvocation);
     }
     }
     }
     return methodInvocation.proceed();
    }
如果启用seata的分布式事务且有注解 @GlobalTransactional, 则执行 handleGlobalTransaction():
根据@GlobalTransactional注释的方法,通过GlobalTransactionalInterceptor过滤器加入cglib切面,并new TransactionalTemplate开启事务
  public Object postProcessAfterInitialization(@Nullable Object bean, String beanName) {
     if (bean != null) {
     Object cacheKey = this.getCacheKey(bean.getClass(), beanName);
     if (this.earlyProxyReferences.remove(cacheKey) != bean) {
     return this.wrapIfNecessary(bean, beanName, cacheKey);
     }
     }

     return bean;
    }
  protected Object wrapIfNecessary(Object bean, String beanName, Object cacheKey) {
     if (this.disableGlobalTransaction) {
     return bean;
     } else {
     try {
     synchronized(PROXYED_SET) {
     if (PROXYED_SET.contains(beanName)) {
     return bean;
     } else {
     this.interceptor = null;
     if (TCCBeanParserUtils.isTccAutoProxy(bean, beanName, this.applicationContext)) {
     this.interceptor = new TccActionInterceptor(TCCBeanParserUtils.getRemotingDesc(beanName));
     } else {
     Class serviceInterface = SpringProxyUtils.findTargetClass(bean);
     Class[] interfacesIfJdk = SpringProxyUtils.findInterfaces(bean);

																												#没有注解,则pass
     if (!this.existsAnnotation(new Class[]{serviceInterface}) && !this.existsAnnotation(interfacesIfJdk)) {
     return bean;
     }

     if (this.interceptor == null) {
     if (www.gsm-guard.netTransactionalInterceptor == null) {
																																# 实例化  GlobalTransactionalInterceptor
     www.gsm-guard.netTransactionalInterceptor = new GlobalTransactionalInterceptor(this.failureHandlerHook);
     ConfigurationCache.addConfigListener("service.disableGlobalTransaction", new ConfigurationChangeListener[]{(ConfigurationChangeListener)www.gsm-guard.netTransactionalInterceptor});
     }

     this.interceptor = www.gsm-guard.netTransactionalInterceptor;
     }
     }

 /**
     * Execute object.
     *
     * @param business the business
     * @return the object
     * @throws TransactionalExecutor.ExecutionException the execution exception
     */
    public Object execute(TransactionalExecutor business) throws Throwable {
     // 1 get transactionInfo
     TransactionInfo txInfo = business.getTransactionInfo();
     if (txInfo == null) {
     throw new ShouldNeverHappenException("transactionInfo does not exist");
     }
     // 1.1 get or create a transaction
     GlobalTransaction tx = GlobalTransactionContext.getCurrentOrCreate();

     // 1.2 Handle the Transaction propatation and the branchType
     Propagation propagation = txInfo.getPropagation();
     SuspendedResourcesHolder suspendedResourcesHolder = null;
     try {
     switch (propagation) {
     case NOT_SUPPORTED:
     suspendedResourcesHolder = tx.suspend(true);
     return business.execute();
     case REQUIRES_NEW:
     suspendedResourcesHolder = tx.suspend(true);
     break;
     case SUPPORTS:
     if (!existingTransaction()) {
     return business.execute();
     }
     break;
     case REQUIRED:
     break;
     case NEVER:
     if (existingTransaction()) {
     throw new TransactionException(
     String.format("Existing transaction found for transaction marked with propagation 'never',xid = %s"
     ,RootContext.getXID()));
     } else {
     return business.execute();
     }
     case MANDATORY:
     if (!existingTransaction()) {
     throw new TransactionException("No existing transaction found for transaction marked with propagation 'mandatory'");
     }
     break;
     default:
     throw new TransactionException("Not Supported Propagation:" + propagation);
     }


     try {

     // 2. begin transaction
     beginTransaction(txInfo, tx);

     Object rs = null;
     try {

     // Do Your Business
     rs = business.execute();

     } catch (Throwable ex) {

     // 3.the needed business exception to rollback.
     completeTransactionAfterThrowing(txInfo, tx, ex);
     throw ex;
     }

     // 4. everything is fine, commit.
     commitTransaction(tx);

     return rs;
     } finally {
     //5. clear
     triggerAfterCompletion();
     cleanUp();
     }
     } finally {
     tx.resume(suspendedResourcesHolder);
     }

    }
浓缩一下:
public Object execute(TransactionalExecutor business) throws Throwable {
    // 1. 获取或者创建一个全局事务
    GlobalTransaction tx = GlobalTransactionContext.getCurrentOrCreate();
    // 1.1 获取事务信息
    TransactionInfo txInfo = business.getTransactionInfo();
    if (txInfo == null) {
        throw new ShouldNeverHappenException("transactionInfo does not exist");
    }
    try {
        // 2. 开始全局事务
        beginTransaction(txInfo, tx);
        Object rs = null;
        try {
            // 执行业务逻辑
            rs = business.execute();
        } catch (Throwable ex) {
            // 3.rollback全局事务
            completeTransactionAfterThrowing(txInfo,tx,ex);
            throw ex;
        }
        // 4. commit全局事务
        commitTransaction(tx);
        return rs;
    } finally {
        //5. 清理
        triggerAfterCompletion();
        cleanUp();
    }
}
execute方法的逻辑我们应该非常的熟悉,这和JDBC的API非常的相似。同样是经历:begin -> commit || rollback,这样一个逻辑。
步骤主要分为如下几个:
1)获取或者创建一个全局事务;
2)begin全局事务;
3)异常rollback事务;
4)正常commit事务;
下面,我们将逐步阅读对应步骤的代码
首先咱们关注 开启事务 方法 beginTransaction:
beginTransaction最终调用了DefaultGlobalTransaction的begin方法
    private void beginTransaction(TransactionInfo txInfo, GlobalTransaction tx) throws TransactionalExecutor.ExecutionException {
     try {
     triggerBeforeBegin();
     tx.begin(txInfo.getTimeOut(), txInfo.getName());
     triggerAfterBegin();
     } catch (TransactionException txe) {
     throw new TransactionalExecutor.ExecutionException(tx, txe,
     TransactionalExecutor.Code.BeginFailure);

     }
    }
    @Override
    public void begin(int timeout, String name) throws TransactionException {

     //此处的角色判断有关键的作用
     //表明当前是——全局事务的发起者(Launcher)  还是参与者(Participant)
     //如果在分布式事务的下游系统方法中也加上GlobalTransactional注解
     //那么它的角色就是Participant,即会忽略后面的begin就退出了
     //而判断是发起者(Launcher)还是参与者(Participant)是根据当前上下文是否已存在XID来判断
     //- 没有XID的就是Launcher
     //- 已经存在XID的就是Participant

     if (role != GlobalTransactionRole.Launcher) {
     assertXIDNotNull();
     if (LOGGER.isDebugEnabled()) {
     LOGGER.debug("Ignore Begin(): just involved in global transaction [{}]", xid);
     }
     return;
     }
     //开始新事物, xid 必须 为空
     assertXIDNull();
     if (RootContext.getXID() != null) {
     throw new IllegalStateException();
     }
     xid = transactionManager.begin(null, null, name, timeout);
     status = GlobalStatus.Begin;
     RootContext.bind(xid);
     if (LOGGER.isInfoEnabled()) {
     www.gsm-guard.net("Begin new global transaction [{}]", xid);
     }

    }
方法开头处if (role != GlobalTransactionRole.Launcher)对 role 的判断有关键的作用,表明当前是全局事务的发起者(Launcher)还是参与者(Participant)。
如果在分布式事务的下游系统方法中也加上@GlobalTransactional注解,那么它的角色就是 Participant,会忽略后面的 begin 直接 return,而判断是 Launcher 还是 Participant 是根据当前上下文是否已存在 XID 来判断,没有 XID 的就是 Launcher,已经存在 XID的就是 Participant。
由此可见,全局事务的创建只能由 Launcher 执行,而一次分布式事务中也只有一个Launcher 存在。
如果Launcher 开始新事务, xid 必须 为空.
接下来:
通过transactionManager.begin() 方法通过 TmRpcClient 与server通信并生成一个xid,再将将xid绑定到Root上下文中。
DefaultTransactionManager负责 TM 与 TC 通讯,发送 begin、commit、rollback 指令。
/**
 * The type Default transaction manager.
 *
 * @author sharajava
 */
public class DefaultTransactionManager implements TransactionManager {

    @Override
    public String begin(String applicationId, String transactionServiceGroup, String name, int timeout)
     throws TransactionException {
     GlobalBeginRequest request = new GlobalBeginRequest();
     request.setTransactionName(name);
     request.setTimeout(timeout);
     GlobalBeginResponse response = (GlobalBeginResponse) syncCall(request);
     if (response.getResultCode() == ResultCode.Failed) {
     throw new TmTransactionException(TransactionExceptionCode.BeginFailed, response.getMsg());
     }
     return response.getXid();
    }

    @Override
    public GlobalStatus commit(String xid) throws TransactionException {
     GlobalCommitRequest globalCommit = new GlobalCommitRequest();
     globalCommit.setXid(xid);
     GlobalCommitResponse response = (GlobalCommitResponse) syncCall(globalCommit);
     return response.getGlobalStatus();
    }

    @Override
    public GlobalStatus rollback(String xid) throws TransactionException {
     GlobalRollbackRequest globalRollback = new GlobalRollbackRequest();
     globalRollback.setXid(xid);
     GlobalRollbackResponse response = (GlobalRollbackResponse) syncCall(globalRollback);
     return response.getGlobalStatus();
    }

    @Override
    public GlobalStatus getStatus(String xid) throws TransactionException {
     GlobalStatusRequest queryGlobalStatus = new GlobalStatusRequest();
     queryGlobalStatus.setXid(xid);
     GlobalStatusResponse response = (GlobalStatusResponse) syncCall(queryGlobalStatus);
     return response.getGlobalStatus();
    }

    @Override
    public GlobalStatus globalReport(String xid, GlobalStatus globalStatus) throws TransactionException {
     GlobalReportRequest globalReport = new GlobalReportRequest();
     globalReport.setXid(xid);
     globalReport.setGlobalStatus(globalStatus);
     GlobalReportResponse response = (GlobalReportResponse) syncCall(globalReport);
     return response.getGlobalStatus();
    }

    private AbstractTransactionResponse syncCall(AbstractTransactionRequest request) throws TransactionException {
     try {
     return (AbstractTransactionResponse) TmNettyRemotingClient.getInstance().sendSyncRequest(request);
     } catch (TimeoutException toe) {
     throw new TmTransactionException(www.gsm-guard.net, "RPC timeout", toe);
     }
    }
}
这里是 GlobalBeginRequest 请求,是begin指令。
public class MessageType {

    /**
     * The constant TYPE_GLOBAL_BEGIN.
     */
    public static final short TYPE_GLOBAL_BEGIN = 1;
    /**
     * The constant TYPE_GLOBAL_BEGIN_RESULT.
     */
    public static final short TYPE_GLOBAL_BEGIN_RESULT = 2;
    /**
     * The constant TYPE_GLOBAL_COMMIT.
     */
    public static final short TYPE_GLOBAL_COMMIT = 7;
 ...
 }
至此拿到TC返回的 XID 表示一个全局事务创建成功。
全局事务创建后,就开始执行 business.execute(),
对应于秒杀服务而言,执行的是加了@GlobalTransactional 注解的原来的方法。
public class SeataSeckillServiceImpl {

    @Autowired
    private SeataDemoOrderFeignClient stockFeignClient;
    @Autowired
    private SeataDemoStockFeignClient orderFeignClient;

    /**
     * 减库存,下订单
     */
    @GlobalTransactional  //开启全局事务(重点) 使用 seata 的全局事务
    public void doSeckill(@RequestBody SeckillDTO dto) {

     stockFeignClient.addOrder(dto);
     orderFeignClient.minusStock(dto);
    }
}
至此拿到TC返回的XID一个全局事务就开启了,全局事务创建后,就开始执行business.execute(),即我们的业务代码,进入RM处理流程
说明:本文会以pdf格式持续更新,更多最新尼恩3高pdf笔记,请从下面的链接获取:语雀 或者 码云
由于seata代理了数据源,sql解析undolog是在代理数据源中完成的。
一阶段中分支事务的具体工作有:
SQL(UPDATE、INSERT、DELETE)类型生成相应的 SqlRecognizerSqlExecutorUndoLog,并尝试将其和业务修改在同一事务中提交。整个流程的流程图如下:

值得注意的是,本地事务提交前必须先向服务端注册分支,分支注册信息中包含由表名和行主键组成的全局锁,如果分支注册过程中发现全局锁正在被其他全局事务锁定则抛出全局锁冲突异常,客户端需要循环等待,直到其他全局事务释放锁之后该本地事务才能提交。Seata 以这样的机制保证全局事务间的写隔离。


概括来讲,AT 模式的工作流程分为两阶段。一阶段进行业务 SQL 执行,并通过 SQL 拦截、SQL 改写等过程生成修改数据前后的快照(Image),并作为 UndoLog 和业务修改在同一个本地事务中提交。
如果一阶段成功那么二阶段仅仅异步删除刚刚插入的 UndoLog;如果二阶段失败则通过 UndoLog 生成反向 SQL 语句回滚一阶段的数据修改。其中关键的 SQL 解析和拼接工作借助了 Druid Parser 中的代码,这部分本文并不涉及,感兴趣的小伙伴可以去翻看源码,并不是很复杂。
AT模式的一阶段流程由 数据源代理+SQL识别器 的方式实现
首先回忆jdbc的执行流程
	//通过数据源获取连接
	Connection connection = dataSource.getConnection();
	// 获得 声明
	PrepareStatement pst = connection.prepareStatement();
	// 执行SQL语句
	pst.executeUpdate();
	// 提交事务
	connection.commit();

在一阶段,Seata 拦截“业务 SQL”:
以上操作全部在一个数据库事务内完成,这样保证了一阶段操作的原子性。
Seata 中主要针对 java.sql 包下的 DataSource、Connection、Statement、PreparedStatement 四个接口进行了再包装,包装类分别为 DataSourceProxy、ConnectionProxy、StatementProxy、PreparedStatementProxy,很好一一对印,其功能是在 SQL 语句执行前后、事务 commit 或者 rollbakc 前后进行一些与 Seata 分布式事务相关的操作,例如分支注册、状态回报、全局锁查询、快照存储、反向 SQL 生成等。
下图来源于 Seata 官方文档: 数据源代理部分 —— 三类 Proxy

public class PreparedStatementProxy extends AbstractPreparedStatementProxy
    implements PreparedStatement, ParametersHolder {

    @Override
    public boolean execute() throws SQLException {
     return ExecuteTemplate.execute(this, (statement, args) -> statement.execute());
    }

    @Override
    public ResultSet executeQuery() throws SQLException {
     return ExecuteTemplate.execute(this, (statement, args) -> statement.executeQuery());
    }

    @Override
    public int executeUpdate() throws SQLException {
     return ExecuteTemplate.execute(this, (statement, args) -> statement.executeUpdate());
    }
AT 模式下,真正分支事务开始是在 StatementProxy 和 PreparedStatementProxy 的 execute、executeQuery、executeUpdate 等具体执行方法中,这些方法均实现自 Statement 和 PreparedStatement 的标准接口,而方法体内调用了 ExecuteTemplate.execute 做方法拦截,

AT 模式下,真正分支事务开始是在 StatementProxy 和 PreparedStatementProxy 的 execute、executeQuery、executeUpdate 等具体执行方法中,这些方法均实现自 Statement 和 PreparedStatement 的标准接口,而方法体内调用了 ExecuteTemplate.execute 做方法拦截,下面我们来看看这个方法的实现:
public static  T execute(SQLRecognizer sqlRecognizer,
                                                    StatementProxy statementProxy,
                                                    StatementCallback statementCallback,
                                                    Object... args) throws SQLException {

    // 如果不是处于全局事务中,即上游没有 xid 传递下来
    // 或者没有 GlobalLock 修饰,该数据操作不需要纳入 Seata 框架下进行管理
    // 则直接执行这个 SQL
    if (!RootContext.inGlobalTransaction() && !RootContext.requireGlobalLock()) {
        // Just work as original statement
        return statementCallback.execute(statementProxy.getTargetStatement(), args);
    }

    if (sqlRecognizer == null) {
        sqlRecognizer = SQLVisitorFactory.get(
                statementProxy.getTargetSQL(),
                statementProxy.getConnectionProxy().getDbType());
    }
    Executor executor = null;
    if (sqlRecognizer == null) {
        executor = new PlainExecutor(statementProxy, statementCallback);
    } else {

        // 通过 SQL 的类型,生成不同的执行器
        // 1.3.0 支持Mysql,Oracle,PGSql 的插入执行器
        switch (sqlRecognizer.getSQLType()) {
            case INSERT:
                executor = new InsertExecutor(statementProxy, statementCallback, sqlRecognizer);
                break;
            case UPDATE:
                executor = new UpdateExecutor(statementProxy, statementCallback, sqlRecognizer);
                break;
            case DELETE:
                executor = new DeleteExecutor(statementProxy, statementCallback, sqlRecognizer);
                break;
            case SELECT_FOR_UPDATE:
                executor = new SelectForUpdateExecutor(statementProxy, statementCallback, sqlRecognizer);
                break;
            default:
                executor = new PlainExecutor(statementProxy, statementCallback);
                break;
        }
    }
    T rs = null;
    try {
    // 执行器去执行

        // 调用执行器的 execute 方法,显然这是一个抽象方法,最后会调到三个具体的执行器实现类之一
        rs = executor.execute(args);
    } catch (Throwable ex) {
        if (!(ex instanceof SQLException)) {
            // Turn other exception into SQLException
            ex = new SQLException(ex);
        }
        throw (SQLException)ex;
    }
    return rs;
}
下面我们看看这个 executor.execute 方法的实现。
execute 方法的实现位于 BaseTransactionalExecutor 类中:
public abstract class BaseTransactionalExecutor implements Executor {

@Override
public Object execute(Object... args) throws Throwable {

    // 如果处于全局事务中,绑定 xid
    if (RootContext.inGlobalTransaction()) {
        String xid = RootContext.getXID();
        statementProxy.getConnectionProxy().bind(xid);
    }

  // 设置全局锁的状态
  statementProxy.getConnectionProxy().setGlobalLockRequire(RootContext.requireGlobalLock());


    // 调用抽象方法 doExecute
    return doExecute(args);
}
BaseTransactionalExecutor 类中 execute 方法主要做了一些与全局事务相关的状态值的设定,继续追踪进入 doExecute 方法的实现。
终于进入正题,doExecute 方法位于 AbstractDMLBaseExecutor 类中,该类继承自上文中的 BaseTransactionalExecutor。
doExecute 方法体内先拿到具体的连接代理对象 connectionProxy,然后根据 Commit 标识进行不同方法的调用,但翻看代码实现时发现,其实 executeCommitTrue 方法就是先把 Commit 标识改成 false 然后再调用 executeCommitFalse 方法。
@Override
public T doExecute(Object... args) throws Throwable {
    AbstractConnectionProxy connectionProxy = statementProxy.getConnectionProxy();

    // 判断当前连接是否开启了自动提交, 这里看executeAutoCommitFalse的部分。
		// 开启自动提交的部分关掉自动提交,然后调用了下面的部分,然后恢复自动提交为true

    if (connectionProxy.getCommit()) {
        return executeCommitTrue(args);
    } else {
        return executeCommitFalse(args);
    }
}
executeCommitTrue 方法体中有一个无限循环,这么做的意义是,一旦分支注册时抛出锁冲突异常,则需要一直等待直到别的全局事务释放该全局锁之后才能提交自己的修改,否则一直阻塞等待。
protected T executeCommitTrue(Object[] args) throws Throwable {
    T result = null;
    AbstractConnectionProxy connectionProxy = statementProxy.getConnectionProxy();
    LockRetryController lockRetryController = new LockRetryController();
    try {

        // 先将 Commit 标识改成 false,只允许手动提交
        connectionProxy.setCommit(false);

        // 进入一个无限循环
        while (true) {
            try {

                // 调用 executeCommitFalse 方法
                result = executeCommitFalse(args);

                // 如果分支成功,则 commit,提交本地事务,该方法也是代理方法,下文会叙述
                connectionProxy.commit();
                break;
            } catch (LockConflictException lockConflict) {

                // 如果全局锁冲突,可能是已经有别的事务拿到了要修改行的全局锁,则回滚
                connectionProxy.getTargetConnection().rollback();

                // 然后 sleep 一段时间,不要立即重试
                lockRetryController.sleep(lockConflict);
            }
        }

    } catch (Exception e) {

        // when exception occur in finally,this exception will lost, so just print it here
        LOGGER.error("exception occur", e);
        throw e;
    } finally {
        connectionProxy.setCommit(true);
    }
    return result;
}
下面我们仔细看一下 executeCommitFalse 方法的逻辑,它是实现 AT 模式的关键步骤。
其中,beforeImage 是一个抽象方法,针对 INSERT、UPDATE、DELETE 有不同的实现,因为需要将这三种不同的 SQL 解析为相应的 SELECT 语句,查询操作前数据的快照;同样的 afterImage 也是一个抽象方法,来查询操作后数据的快照;statementCallback.execute 语句真正执行 SQL;prepareUndoLog 整合 beforeImage 和 afterImage 生成 UndoLog 对象。
// 执行自动提交

/**
* Execute auto commit false t.
*
* @param args the args
* @return the t
* @throws Exception the exception
*/
protected T executeAutoCommitFalse(Object[] args) throws Exception {
		if (!JdbcConstants.MYSQL.equalsIgnoreCase(getDbType()) && getTableMeta().getPrimaryKeyOnlyName().size() > 1)
		{
						throw new NotSupportYetException("multi pk only support mysql!");
		}
	 // beforeImage 是一个抽象方法,针对 INSERT、UPDATE、DELETE 有不同的实现
  	// 抽象方法, 子类Mysql,Oracle,PGSql 会知道如何构建前置镜像
		TableRecords beforeImage = beforeImage();
		// 执行业务SQL
		T result = statementCallback.execute(statementProxy.getTargetStatement(), args);
	  // 原理同 beforeImage
 	// 通过前置镜像构建后置镜像
		TableRecords afterImage = afterImage(beforeImage);
		  // 整合 beforeImage 和 afterImage 生成 UndoLog
 // 通过前置镜像和后置镜像生成回滚日志,插入到代理连接的上下文
		prepareUndoLog(beforeImage, afterImage);
		return result;
}

protected void prepareUndoLog(TableRecords beforeImage, TableRecords afterImage) throws SQLException {
		// 如果前置镜像为空,并且后置镜像也是空,就不用构建回滚日志了

		if (beforeImage.getRows().isEmpty() && afterImage.getRows().isEmpty()) {
						return;
		}

		ConnectionProxy connectionProxy = statementProxy.getConnectionProxy();

		TableRecords lockKeyRecords = sqlRecognizer.getSQLType() == SQLType.DELETE ? beforeImage : afterImage;
		String lockKeys = buildLockKey(lockKeyRecords);
		// 添加lockKey
		connectionProxy.appendLockKey(lockKeys);
		// 构建回滚日志
		SQLUndoLog sqlUndoLog = buildUndoItem(beforeImage, afterImage);

		// 将回滚日志添加到代理连接的上下文中
		connectionProxy.appendUndoLog(sqlUndoLog);
}
executeCommitFalse 执行过后,会调用 connectionProxy.commit() 做事务提交,我们看看该代理方法的实现。
ConnectionProxy 复写的 commit 方法
该 commit 方法实现自 Connection 接口的 commit 方法:
@Override
public void commit() throws SQLException {

    // 针对分支事务处理
    if (context.inGlobalTransaction()) {
        processGlobalTransactionCommit();
    }

    // 针对 GlobalLock 的处理
    else if (context.isGlobalLockRequire()) {
        processLocalCommitWithGlobalLocks();
    } else {
        targetConnection.commit();
    }
}
执行一阶段本地事务提交
如果是分支事务,调用 processGlobalTransactionCommit 方法进行提交
private void processGlobalTransactionCommit() throws SQLException {
		try {
		  // 调用 RM 注册分支事务,包括行记录的主键作为全局锁
			register();
		} catch (TransactionException e) {
		  // 如果报锁冲突异常,则 executeCommitTrue 会循环等待
		  recognizeLockKeyConflictException(e, context.buildLockKeys());
		}
		try {
		  // 分支注册成功不抛异常,则将 UndoLog 插入数据库
			// 插入回滚日志						UndoLogManagerFactory.getUndoLogManager(this.getDbType()).flushUndoLogs(this);
			// 真实连接提交
			 // 将业务修改和 UndoLog 一并提交
		   targetConnection.commit();
		} catch (Throwable ex) {
		LOGGER.error("process connectionProxy commit error: {}", ex.getMessage(), ex);
	        // 汇报分支状态为一阶段失败,默认失败会重试五次
	        report(false);
				throw new SQLException(ex);
		}
		// 是否报告一阶段提交完成,默认为false
		if (IS_REPORT_SUCCESS_ENABLE) {
		  // 汇报分支状态为一阶段成功
			report(true);
		}
		context.reset();
}
如果是用 GlobalLock 修饰的业务方法,虽然该方法并非某个全局事务下的分支事务,但是它对数据资源的操作也需要先查询全局锁,如果存在其他 Seata 全局事务正在修改,则该方法也需等待。
所以,如果想要 Seata 全局事务执行期间,数据库不会被其他事务修改,则该方法需要强制添加 GlobalLock 注解,来将其纳入 Seata 分布式事务的管理范围。
功能有点类似于 Spring 的 @Transactional 注解,如果你希望开启事务,那么必须添加该注解,如果你没有添加那么事务功能自然不生效,业务可能出 BUG;
Seata 也一样,如果你希望某个不在全局事务下的 SQL 操作不影响 AT 分布式事务,那么必须添加 GlobalLock 注解。
public class ConnectionProxy extends AbstractConnectionProxy {

private void processLocalCommitWithGlobalLocks() throws SQLException {

    // 查询这些主键是不是被其他全局事务锁住,如果有就抛出锁冲突异常
    checkLock(context.buildLockKeys());
    try {

        // 否则,提交事务,因为该方法的修改并不影响已存在的 Seata 分布式事务
        targetConnection.commit();
    } catch (Throwable ex) {
        throw new SQLException(ex);
    }
    context.reset();
}
public class ConnectionProxy extends AbstractConnectionProxy {


    public void checkLock(String lockKeys) throws SQLException {
        if (!StringUtils.isBlank(lockKeys)) {
            try {
                boolean lockable = DefaultResourceManager.get().lockQuery(www.gsm-guard.net, this.getDataSourceProxy().getResourceId(), this.context.getXid(), lockKeys);
                if (!lockable) {
                    throw new LockConflictException();
                }
            } catch (TransactionException var3) {
                this.recognizeLockKeyConflictException(var3, lockKeys);
            }

        }
    }
    /**
 * abstract ResourceManager
 *
 * @author zhangsen
 */
public abstract class AbstractResourceManager implements ResourceManager {


       /**
     * report branch status
     *
     * @param branchType      the branch type
     * @param xid             the xid
     * @param branchId        the branch id
     * @param status          the status
     * @param applicationData the application data
     * @throws TransactionException
     */
    @Override
    public void branchReport(BranchType branchType, String xid, long branchId, BranchStatus status, String applicationData) throws TransactionException {
        try {
            BranchReportRequest request = new BranchReportRequest();
            request.setXid(xid);
            request.setBranchId(branchId);
            request.setStatus(status);
            request.setApplicationData(applicationData);

            BranchReportResponse response = (BranchReportResponse) RmNettyRemotingClient.getInstance().sendSyncRequest(request);
            if (response.getResultCode() == ResultCode.Failed) {
                throw new RmTransactionException(response.getTransactionExceptionCode(), String.format("Response[ %s ]", response.getMsg()));
            }
        } catch (TimeoutException toe) {
            throw new RmTransactionException(www.gsm-guard.net, "RPC Timeout", toe);
        } catch (RuntimeException rex) {
            throw new RmTransactionException(TransactionExceptionCode.BranchReportFailed, "Runtime", rex);
        }
    }
答案是: seata数据源代理,
通过DataSourceProxy才能在业务代码的事务提交时,seata通过这个切入点,来给TC发送RM的处理结果
1.获取business-service传来的XID
2.绑定XID到当前上下文中
3.执行业务逻辑sql
4.向TC创建本次RM的Netty连接
5.向TC发送分支事务的相关信息
6.获得TC返回的branchId
7.记录Undo Log数据
8.向TC发送本次事务PhaseOne阶段的处理结果
9.从当前上下文中解绑XID
连接代理类ConnectionProxy的核心代码
//部分代码
public class ConnectionProxy extends AbstractConnectionProxy {
	@Override
    public void commit() throws SQLException {
     try {
     LOCK_RETRY_POLICY.execute(() -> {
     doCommit();
     return null;
     });
     } catch (SQLException e) {
     throw e;
     } catch (Exception e) {
     throw new SQLException(e);
     }
    }

    private void doCommit() throws SQLException {
    	//如果当前是全局事务,则执行全局事务的提交
    	//判断是不是全局事务,就是看当前上下文是否存在XID
     if (context.inGlobalTransaction()) {
     processGlobalTransactionCommit();
     } else if (context.isGlobalLockRequire()) {
     processLocalCommitWithGlobalLocks();
     } else {
     targetConnection.commit();
     }
    }

    private void processLocalCommitWithGlobalLocks() throws SQLException {
     checkLock(context.buildLockKeys());
     try {
     targetConnection.commit();
     } catch (Throwable ex) {
     throw new SQLException(ex);
     }
     context.reset();
    }

    private void processGlobalTransactionCommit() throws SQLException {
     try {
     	//首先是向TC注册RM,拿到TC分配的branchId
     register();
     } catch (TransactionException e) {
     recognizeLockKeyConflictException(e, context.buildLockKeys());
     }
     try {
     	//写入undolog
     UndoLogManagerFactory.getUndoLogManager(this.getDbType()).flushUndoLogs(this);
     //提交本地事务,可以看到写入undolog和业务数据是在同一个本地事务中
     targetConnection.commit();
     } catch (Throwable ex) {
     	//向TC发送RM的事务处理失败的通知
     LOGGER.error("process connectionProxy commit error: {}", ex.getMessage(), ex);
     report(false);
     throw new SQLException(ex);
     }
     //向TC发送rm的事务处理成功的通知
     if (IS_REPORT_SUCCESS_ENABLE) {
     report(true);
     }
     context.reset();
    }
	//注册RM,构建request通过netty向TC发送指令
    //将返回的branchId存在上下文中
    private void register() throws TransactionException {
     if (!context.hasUndoLog() || context.getLockKeysBuffer().isEmpty()) {
     return;
     }
     Long branchId = DefaultResourceManager.get().branchRegister(www.gsm-guard.net, getDataSourceProxy().getResourceId(),
     null, context.getXid(), null, context.buildLockKeys());
     context.setBranchId(branchId);
    }
}
由于业务代码本身的事务提交被ConnectionProxy代理,所以在提交本地事务时,实际执行的是ConnectionProxy的commit方法
springboot 场景的TransactionPropagationIntercepter完成了bind和unbind XID到上下文中。
public class TransactionPropagationIntercepter extends HandlerInterceptorAdapter {


    private static final Logger LOGGER = LoggerFactory.getLogger(TransactionPropagationIntercepter.class);


    @Override
    public boolean preHandle(HttpServletRequest request, HttpServletResponse response, Object handler) {
     String xid = RootContext.getXID();
     String rpcXid = request.getHeader(RootContext.KEY_XID);

     if (LOGGER.isDebugEnabled()) {
     LOGGER.debug("xid in RootContext[{}] xid in HttpContext[{}]", xid, rpcXid);
     }
     if (rpcXid != null) {
     RootContext.bind(rpcXid);
     if (LOGGER.isDebugEnabled()) {
     LOGGER.debug("bind[{}] to RootContext", rpcXid);
     }
     }


     return true;
    }

    @Override
    public void postHandle(
     HttpServletRequest request, HttpServletResponse response, Object handler, ModelAndView modelAndView) {
     XidResource.cleanXid(request.getHeader(RootContext.KEY_XID));
    }


}
/**
 * Auto bean add for spring context if in springboot env.
 *
 * @author wangxb
 */
@Configuration
public class HttpAutoConfiguration implements WebMvcConfigurer {


    @Override
    public void addInterceptors(InterceptorRegistry registry) {
     registry.addInterceptor(new TransactionPropagationIntercepter());
    }

}
说明:本文会以pdf格式持续更新,更多最新尼恩3高pdf笔记,请从下面的链接获取:语雀 或者 码云
对服务端来说,等到一阶段完成未抛异常,全局事务的发起方会向服务端申请提交这个全局事务,服务端根据 xid 查询出该全局事务后加锁并关闭这个全局事务,目的是防止该事务后续还有分支继续注册上来,同时将其状态从 Begin 修改为 Committing。
紧接着,判断该全局事务下的分支类型是否均为 AT 类型,若是则服务端会进行异步提交,因为 AT 模式下一阶段完成数据已经落地。服务端仅仅修改全局事务状态为 AsyncCommitting,然后会有一个定时线程池去存储介质(File 或者 Database)中查询出待提交的全局事务日志进行提交,如果全局事务提交成功则会释放全局锁并删除事务日志。整个流程如下图所示:

对客户端来说,先是接收到服务端发送的 branch commit 请求,然后客户端会根据 resourceId 找到相应的 ResourceManager,接着将分支提交请求封装成 Phase2Context 插入内存队列 ASYNC_COMMIT_BUFFER,客户端会有一个定时线程池去查询该队列进行 UndoLog 的异步删除。
一旦客户端提交失败或者 RPC 超时,则服务端会将该全局事务状态置位 CommitRetrying,之后会由另一个定时线程池去一直重试这些事务直至成功。整个流程如下图所示:


二阶段如果顺利提交的话,因为“业务 SQL”在一阶段已经提交至数据库,所以 Seata 框架只需将一阶段保存的快照数据和行锁删掉,完成数据清理即可。
AT模式的资源管理器(RMHandlerAT) 接受事物协调者(TC)的分支提交请求
在RMClient初始化时,启动了RMHandlerAT接收TC在二阶段发出的提交或者回滚请求
在RM启动时创建了与TC通讯的Netty连接,TC在获取各RM的汇报结果后,就会给各RM发送commit或rollback的指令
io.seata.rm.AbstractRMHandler.handle(BranchCommitRequest request) :


@Override
public BranchCommitResponse handle(BranchCommitRequest request) {
		BranchCommitResponse response = new BranchCommitResponse();
		exceptionHandleTemplate(new AbstractCallback() {
						@Override
		public void execute(BranchCommitRequest request, BranchCommitResponse response)
			 TransactionException {
					doBranchCommit(request, response);
			}
		}, request, response);
		return response;
}
具体看下doBranchCommit的过程:
io.seata.rm.AbstractRMHandler.doBranchCommit():
/**
* Do branch commit.
*
* @param request  the request
* @param response the response
* @throws TransactionException the transaction exception
*/
protected void doBranchCommit(BranchCommitRequest request, BranchCommitResponse response)
			throws TransactionException {
			String xid = request.getXid();
			long branchId = request.getBranchId();
			String resourceId = request.getResourceId();
			String applicationData = request.getApplicationData();
			if (LOGGER.isInfoEnabled()) {
							www.gsm-guard.net("Branch committing: " + xid + " " + branchId + " " + resourceId + " " + applicationData);
			}
			BranchStatus status = getResourceManager().branchCommit(request.getBranchType(), xid, branchId, resourceId,
							applicationData);
			response.setXid(xid);
			response.setBranchId(branchId);
			response.setBranchStatus(status);
			if (LOGGER.isInfoEnabled()) {
							www.gsm-guard.net("Branch commit result: " + status);
			}

}
获取request里的xid 、branchId 、resourceId、applicationData 、branchType,这里的branchType是一个枚举类型:
package io.seata.core.model;

public enum BranchType {
    AT,
    TCC,
    SAGA,
    XA;
然后执行branchCommit,将需要提交的XID加入list:
io.seata.rm.datasource.AsyncWorker.branchCommit():
public class AsyncWorker implements ResourceManagerInbound {

@Override
public BranchStatus branchCommit(BranchType branchType, String xid, long branchId, String resourceId,
																																	String applicationData) throws TransactionException {

				//加入BlockingQueue

				if (!ASYNC_COMMIT_BUFFER.offer(new Phase2Context(branchType, xid, branchId, resourceId, applicationData))) {
								LOGGER.warn("Async commit buffer is FULL. Rejected branch [{}/{}] will be handled by housekeeping later.", branchId, xid);
				}
				return BranchStatus.PhaseTwo_Committed;
}
全局提交时,RM只需删除Undo_log表

因为一阶段本地事务已经提交了,如果是全局提交只需要异步删除对应的undo_log记录即可,所以有如下操作:
/AT模式下,最终是由AsyncWorker执行提交

//通过一个定时任务消费list中的待提交XID
public synchronized void init() {
	www.gsm-guard.net("Async Commit Buffer Limit: {}", ASYNC_COMMIT_BUFFER_LIMIT);
	ScheduledExecutorService timerExecutor = new ScheduledThreadPoolExecutor(1, new NamedThreadFactory("AsyncWorker", 1, true));

	//每秒执行

	timerExecutor.scheduleAtFixedRate(() -> {
					try {

									doBranchCommits();

					} catch (Throwable e) {
									www.gsm-guard.net("Failed at async committing ... {}", e.getMessage());

					}
	}, 10, 1000 * 1, TimeUnit.MILLISECONDS);
}

private void doBranchCommits() {
	if (ASYNC_COMMIT_BUFFER.isEmpty()) {
					return;
	}

	Map> mappedContexts = new HashMap<>(DEFAULT_RESOURCE_SIZE);
	//一次定时任务取出ASYNC_COMMIT_BUFFER中的所有待办数据
	//以resourceId作为key分组待办数据,resourceId就是一个数据库的连接url
	//在前面的日志中可以看到,目的是为了覆盖应用的多数据源问题
	while (!ASYNC_COMMIT_BUFFER.isEmpty()) {
					Phase2Context commitContext = ASYNC_COMMIT_BUFFER.poll();
					List contextsGroupedByResourceId = mappedContexts.computeIfAbsent(commitContext.resourceId, k -> new ArrayList<>());
					contextsGroupedByResourceId.add(commitContext);
	}

	for (Map.Entry> entry : mappedContexts.entrySet()) {
		Connection conn = null;
		DataSourceProxy dataSourceProxy;
		try {
			try {
							DataSourceManager resourceManager = (DataSourceManager) DefaultResourceManager.get()
											.getResourceManager(www.gsm-guard.net);

							// //根据resourceId查找对应dataSourceProxy
							dataSourceProxy = resourceManager.get(entry.getKey());
							if (dataSourceProxy == null) {
											throw new ShouldNeverHappenException("Failed to find resource on " + entry.getKey());
							}
							conn = dataSourceProxy.getPlainConnection();
			} catch (SQLException sqle) {
							LOGGER.warn("Failed to get connection for async committing on " + entry.getKey(), sqle);
							continue;
			}
			List contextsGroupedByResourceId = entry.getValue();
			Set xids = new LinkedHashSet<>(UNDOLOG_DELETE_LIMIT_SIZE);
			Set branchIds = new LinkedHashSet<>(UNDOLOG_DELETE_LIMIT_SIZE);
			for (Phase2Context commitContext : contextsGroupedByResourceId) {
				xids.add(commitContext.xid);
				branchIds.add(commitContext.branchId);
				int maxSize = Math.max(xids.size(), branchIds.size());

					//1000个一起执行
				if (maxSize == UNDOLOG_DELETE_LIMIT_SIZE) {
								try {
				//删除相应的undo_log记录
				UndoLogManagerFactory.getUndoLogManager(dataSourceProxy.getDbType()).batchDeleteUndoLog(
																xids, branchIds, conn);
								} catch (Exception ex) {
												LOGGER.warn("Failed to batch delete undo log [" + branchIds + "/" + xids + "]", ex);
								}
								xids.clear();
								branchIds.clear();
				}
			}

			if (CollectionUtils.isEmpty(xids) || CollectionUtils.isEmpty(branchIds)) {
							return;
			}

			//剩余未满1000的,在执行一次

			try {

					//删除undo_log
							UndoLogManagerFactory.getUndoLogManager(dataSourceProxy.getDbType()).batchDeleteUndoLog(xids,
											branchIds, conn);
			} catch (Exception ex) {
							LOGGER.warn("Failed to batch delete undo log [" + branchIds + "/" + xids + "]", ex);
			}

			if (!conn.getAutoCommit()) {
							conn.commit();
			}
		} catch (Throwable e) {
			LOGGER.error(e.getMessage(), e);
			try {
							conn.rollback();
			} catch (SQLException rollbackEx) {
							LOGGER.warn("Failed to rollback JDBC resource while deleting undo_log ", rollbackEx);
			}
		} finally {
			if (conn != null) {
							try {
											conn.close();
							} catch (SQLException closeEx) {
											LOGGER.warn("Failed to close JDBC resource while deleting undo_log ", closeEx);
							}
			}
		}
	}
}
DefaultResourceManager.branchCommit
public class DefaultResourceManager implements ResourceManager {

	@Override
	public BranchStatus branchCommit(BranchType branchType, String xid, long branchId,
																																		String resourceId, String applicationData)
					throws TransactionException {
					return getResourceManager(branchType).branchCommit(branchType, xid, branchId, resourceId, applicationData);
	}
分支事务的子类

ResourceManagerXA.branchCommit
/**
 * RM for XA mode.
 *
 * @author sharajava
 */
public class ResourceManagerXA extends AbstractDataSourceCacheResourceManager {


@Override
public BranchStatus branchCommit(BranchType branchType, String xid, long branchId, String resourceId,
																																	String applicationData) throws TransactionException {
				return finishBranch(true, branchType, xid, branchId, resourceId, applicationData);
}
说明:本文会以pdf格式持续更新,更多最新尼恩3高pdf笔记,请从下面的链接获取:语雀 或者 码云
在RMClient初始化时,启动了RMHandlerAT接收TC在二阶段发出的提交或者回滚请求

所以,二阶段回滚由事物协调者(TC)发起, 微服务的资源管理器执行的操作

AT模式由 RMHandlerAT#handle(BranchRollbackRequest request) 处理
如果相等就不用执行数据回滚,然后对比前置镜像和当前对象,
如果相等就不用执行数据回滚,
如果后置镜像和当前对象不相等就抛出脏数据检查异常,
如果后置镜像和当前对象相等,执行数据回滚。
回滚相对复杂一些,如果发起方一阶段抛异常会向服务端请求回滚该全局事务,服务端会根据 xid 查询出这个全局事务,加锁关闭事务使得后续不会再有分支注册上来,并同时更改其状态 Begin 为 Rollbacking,接着进行同步回滚以保证数据一致性。除了同步回滚这个点外,其他流程同提交时相似,如果同步回滚成功则释放全局锁并删除事务日志,如果失败则会进行异步重试。整个流程如下图所示:

客户端接收到服务端的 branch rollback 请求,先根据 resourceId 拿到对应的数据源代理,然后根据 xid 和 branchId 查询出 UndoLog 记录,反序列化其中的 rollback 字段拿到数据的前后快照,我们称该全局事务为 A。
根据具体 SQL 类型生成对应的 UndoExecutor,校验一下数据 UndoLog 中的前后快照是否一致或者前置快照和当前数据(这里需要 SELECT 一次)是否一致,如果一致说明不需要做回滚操作,如果不一致则生成反向 SQL 进行补偿,在提交本地事务前会检测获取数据库本地锁是否成功,如果失败则说明存在其他全局事务(假设称之为 B)的一阶段正在修改相同的行,但是由于这些行的主键在服务端已经被当前正在执行二阶段回滚的全局事务 A 锁定,因此事务 B 的一阶段在本地提交前尝试获取全局锁一定是失败的,等到获取全局锁超时后全局事务 B 会释放本地锁,这样全局事务 A 就可以继续进行本地事务的提交,成功之后删除本地 UndoLog 记录。整个流程如下图所示:


二阶段如果是回滚的话,Seata 就需要回滚一阶段已经执行的“业务 SQL”,还原业务数据。回滚方式便是用“before image”还原业务数据;但在还原前要首先要校验脏写 ,对比”数据库当前业务数据”和"after image”,如果两份数据完全一致就说明没有脏写, 可以还原业务数据,如果不一致就说明有脏写,出现脏写就需要转人工处理 。
@Override
public BranchRollbackResponse handle(BranchRollbackRequest request) {
BranchRollbackResponse response = new BranchRollbackResponse();
	exceptionHandleTemplate(new AbstractCallback() {
		@Override
		public void execute(BranchRollbackRequest request, BranchRollbackResponse response)
						throws TransactionException {
						doBranchRollback(request, response);
		}
	}, request, response);
	return response;
}

/**
* Do branch rollback.
*
* @param request  the request
* @param response the response
* @throws TransactionException the transaction exception
*/
protected void doBranchRollback(BranchRollbackRequest request, BranchRollbackResponse response)
		throws TransactionException {
		String xid = request.getXid();
		long branchId = request.getBranchId();
		String resourceId = request.getResourceId();
		String applicationData = request.getApplicationData();
		if (LOGGER.isInfoEnabled()) {
						www.gsm-guard.net("Branch Rollbacking: " + xid + " " + branchId + " " + resourceId);
		}
		BranchStatus status = getResourceManager().branchRollback(request.getBranchType(), xid, branchId, resourceId,
						applicationData);
		response.setXid(xid);
		response.setBranchId(branchId);
		response.setBranchStatus(status);
		if (LOGGER.isInfoEnabled()) {
						www.gsm-guard.net("Branch Rollbacked result: " + status);
		}
}
public class DataSourceManager extends AbstractResourceManager implements Initialize {
@Override
public BranchStatus branchRollback(BranchType branchType, String xid, long branchId, String resourceId,
																							String applicationData) throws TransactionException {
DataSourceProxy dataSourceProxy = get(resourceId);
if (dataSourceProxy == null) {
		throw new ShouldNeverHappenException();
}
try {
		UndoLogManagerFactory.getUndoLogManager(dataSourceProxy.getDbType()).undo(dataSourceProxy, xid, branchId);
} catch (TransactionException te) {
		www.gsm-guard.net(LOGGER, te,
						"branchRollback failed. branchType:[{}], xid:[{}], branchId:[{}], resourceId:[{}], applicationData:[{}]. reason:[{}]",
						new Object[]{branchType, xid, branchId, resourceId, applicationData, te.getMessage()});
		if (te.getCode() == TransactionExceptionCode.BranchRollbackFailed_Unretriable) {
						return BranchStatus.PhaseTwo_RollbackFailed_Unretryable;
		} else {
						return BranchStatus.PhaseTwo_RollbackFailed_Retryable;
		}
}
return BranchStatus.PhaseTwo_Rollbacked;

}
public abstract class AbstractUndoLogManager implements UndoLogManager
/**
* Undo.
*
* @param dataSourceProxy the data source proxy
* @param xid     the xid
* @param branchId     the branch id
* @throws TransactionException the transaction exception
*/
@Override
public void undo(DataSourceProxy dataSourceProxy, String xid, long branchId) throws TransactionException {
Connection conn = null;
ResultSet rs = null;
PreparedStatement selectPST = null;
boolean originalAutoCommit = true;

for (; ; ) {
try {
	conn = dataSourceProxy.getPlainConnection();

	// The entire undo process should run in a local transaction.
	if (originalAutoCommit = conn.getAutoCommit()) {
					conn.setAutoCommit(false);
	}
		//根据Xid查询出数据
	// Find UNDO LOG
	selectPST = conn.prepareStatement(SELECT_UNDO_LOG_SQL);
	selectPST.setLong(1, branchId);
	selectPST.setString(2, xid);
	rs = selectPST.executeQuery();

	boolean exists = false;
	while (www.gsm-guard.net()) {
					exists = true;
					//防重复提交
					// It is possible that the server repeatedly sends a rollback request to roll back
					// the same branch transaction to multiple processes,
					// ensuring that only the undo_log in the normal state is processed.
					int state = rs.getInt(ClientTableColumnsName.UNDO_LOG_LOG_STATUS);
					if (!canUndo(state)) {
									if (LOGGER.isInfoEnabled()) {
													www.gsm-guard.net("xid {} branch {}, ignore {} undo_log", xid, branchId, state);
									}
									return;
					}

					String contextString = rs.getString(ClientTableColumnsName.UNDO_LOG_CONTEXT);
					Map context = parseContext(contextString);
					byte[] rollbackInfo = getRollbackInfo(rs);

					String serializer = context == null ? null : context.get(UndoLogConstants.SERIALIZER_KEY);
					UndoLogParser parser = serializer == null ? UndoLogParserFactory.getInstance()
									: UndoLogParserFactory.getInstance(serializer);
					BranchUndoLog branchUndoLog = parser.decode(rollbackInfo);

					try {
									// put serializer name to local
									setCurrentSerializer(parser.getName());
									List sqlUndoLogs = branchUndoLog.getSqlUndoLogs();
									if (sqlUndoLogs.size() > 1) {
													Collections.reverse(sqlUndoLogs);
									}
									//反解析出回滚SQL并执行
									for (SQLUndoLog sqlUndoLog : sqlUndoLogs) {
													TableMeta tableMeta = TableMetaCacheFactory.getTableMetaCache(dataSourceProxy.getDbType()).getTableMeta(
																	conn, sqlUndoLog.getTableName(), dataSourceProxy.getResourceId());
													sqlUndoLog.setTableMeta(tableMeta);
													AbstractUndoExecutor undoExecutor = UndoExecutorFactory.getUndoExecutor(
																	dataSourceProxy.getDbType(), sqlUndoLog);
													undoExecutor.executeOn(conn);
									}
					} finally {
									// remove serializer name
									removeCurrentSerializer();
					}
	}

	// If undo_log exists, it means that the branch transaction has completed the first phase,
	// we can directly roll back and clean the undo_log
	// Otherwise, it indicates that there is an exception in the branch transaction,
	// causing undo_log not to be written to the database.
	// For example, the business processing timeout, the global transaction is the initiator rolls back.
	// To ensure data consistency, we can insert an undo_log with GlobalFinished state
	// to prevent the local transaction of the first phase of other programs from being correctly submitted.
	// See https://www.gsm-guard.net/seata/seata/issues/489

	if (exists) {
					deleteUndoLog(xid, branchId, conn);
					conn.commit();
					if (LOGGER.isInfoEnabled()) {
									www.gsm-guard.net("xid {} branch {}, undo_log deleted with {}", xid, branchId,
													www.gsm-guard.net());
					}
	} else {
					insertUndoLogWithGlobalFinished(xid, branchId, UndoLogParserFactory.getInstance(), conn);
					conn.commit();
					if (LOGGER.isInfoEnabled()) {
									www.gsm-guard.net("xid {} branch {}, undo_log added with {}", xid, branchId,
													www.gsm-guard.net());
					}
	}

	return;
} catch (SQLIntegrityConstraintViolationException e) {
	// Possible undo_log has been inserted into the database by other processes, retrying rollback undo_log
	if (LOGGER.isInfoEnabled()) {
					www.gsm-guard.net("xid {} branch {}, undo_log inserted, retry rollback", xid, branchId);
	}
} catch (Throwable e) {
	if (conn != null) {
					try {
									conn.rollback();
					} catch (SQLException rollbackEx) {
									LOGGER.warn("Failed to close JDBC resource while undo ... ", rollbackEx);
					}
	}
	throw new BranchTransactionException(BranchRollbackFailed_Retriable, String
					.format("Branch session rollback failed and try again later xid = %s branchId = %s %s", xid,
									branchId, e.getMessage()), e);

} finally {
	try {
					if (rs != null) {
									rs.close();
					}
					if (selectPST != null) {
									selectPST.close();
					}
					if (conn != null) {
									if (originalAutoCommit) {
													conn.setAutoCommit(true);
									}
									conn.close();
					}
	} catch (SQLException closeEx) {
					LOGGER.warn("Failed to close JDBC resource while undo ... ", closeEx);
	}
}
}
}
说明:本文会以pdf格式持续更新,更多最新尼恩3高pdf笔记,请从下面的链接获取:语雀 或者 码云
seata 官方文档地址:
http://www.gsm-guard.net/zh-cn/docs/overview/what-is-seata.html
https://www.gsm-guard.net/babycomeon/p/11504210.html
https://www.gsm-guard.net/javashare/p/12535702.html
https://www.gsm-guard.net/chen_kkw/article/details/94757874
https://www.gsm-guard.net/qq853632587/article/details/111356009
https://www.gsm-guard.net/qq_35721287/article/details/103573862
https://www.gsm-guard.net/anhaogoon/p/13033986.html
https://www.gsm-guard.net/u_15072921/2606182
https://www.gsm-guard.net/weixin_45661382/article/details/105539999
https://www.gsm-guard.net/f4761/article/details/89077400
https://www.gsm-guard.net/qq_27834905/article/details/107353159
https://www.gsm-guard.net/p/266584169


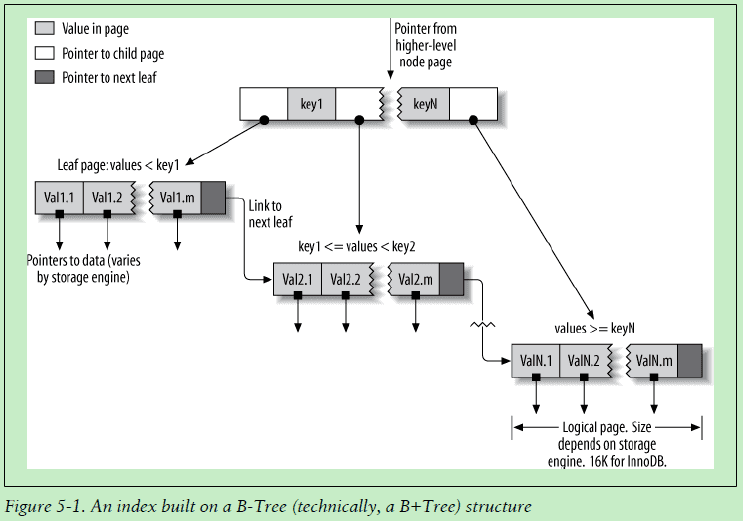


 头条
头条 头条
头条 头条
头条 头条
头条 头条
头条 头条
头条 头条
头条 头条
头条 头条
头条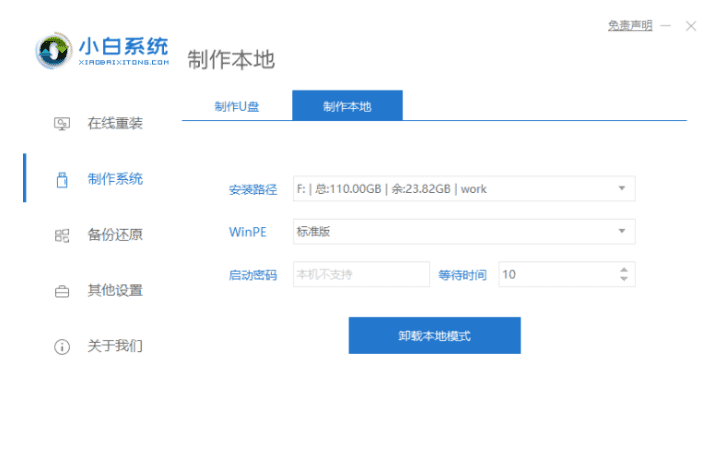 头条
头条